# HolyBro QAV250 + Pixhawk4-Mini 构建
Holybro Pixhawk 4 Mini QAV250 套件 (打开新窗口)是开始使用 Pixhawk 4 的绝佳方式。套件包括一个碳纤维 QAV250 竞赛框架、 Pixhawk 4 Mini以及所需的几乎所有其他组件(电池和接收器除外)。该套件有支持 FPV 和不支持 FPV 两种型号。
本主题提供了构建套件和配置 PX4 的完整说明,可使用 QGroundControl.
关键信息
- 框架 圣溪 QAV250
- 飞行控制器: Pixhawk 4 Mini
- 组装时间(约): 3.5 小时(框架 2 小时,自动驾驶仪安装/配置 1.5 小时)
# 快速入门指南
Pixhawk 4 Mini QAV250 套件快速入门指南 (打开新窗口)
# 材料清单
圣溪 Pixhawk 4 Mini QAV250 套件 (打开新窗口) 包括几乎所有必需的组件:
- Pixhawk 4 Mini
- Holybro 遥测无线电 V3 (打开新窗口)
- 圣溪电源模块
- 带电调的完全组装电源管理板
- 电机 - DR2205 KV2300
- 5" 塑料道具
- 碳纤维 250 机身及硬件
- 福克斯摄像机
- Vtx 5.8ghz
此外,您还需要电池和接收器(+兼容的发射器)。此构建使用
# 硬件
本节列出了机架和自动驾驶仪安装的所有硬件。
# 框架 QAV250
| 说明 | 数量 |
|---|---|
| 一体式框架板 | 1 |
| 飞行控制器盖板 | 1 |
| PDB | 1 |
| 相机板 | 1 |
| 35 毫米支座 | 6 |
| 乙烯基螺钉和螺母 | 4 |
| 15 毫米钢螺钉 | 8 |
| 钢螺母 | 8 |
| 7 毫米钢螺钉 | 12 |
| 魔术贴电池带 | 1 |
| 电池泡沫 | 1 |
| 着陆坪 | 4 |
# 电子产品
| 说明 | 数量 |
|---|---|
| 电机 - DR2205 KV2300 | 4 |
| 带电调的完全组装电源管理板 | 4 |
| Holybro 电源模块 | 1 |
| Fr-sky D4R-II 接收机 | 1 |
| Pixhawk 4 mini | 1 |
| Holybro GPS Neo-M8N | 1 |
| 圣卡罗 Holybro 遥测无线电 V3 (打开新窗口) | 1 |
| 电池流明 1300 毫安 4S 14.8V | 1 |
| Vtx 5.8gHz | 1 |
| FPV 摄像机(仅全套套件) | 1 |
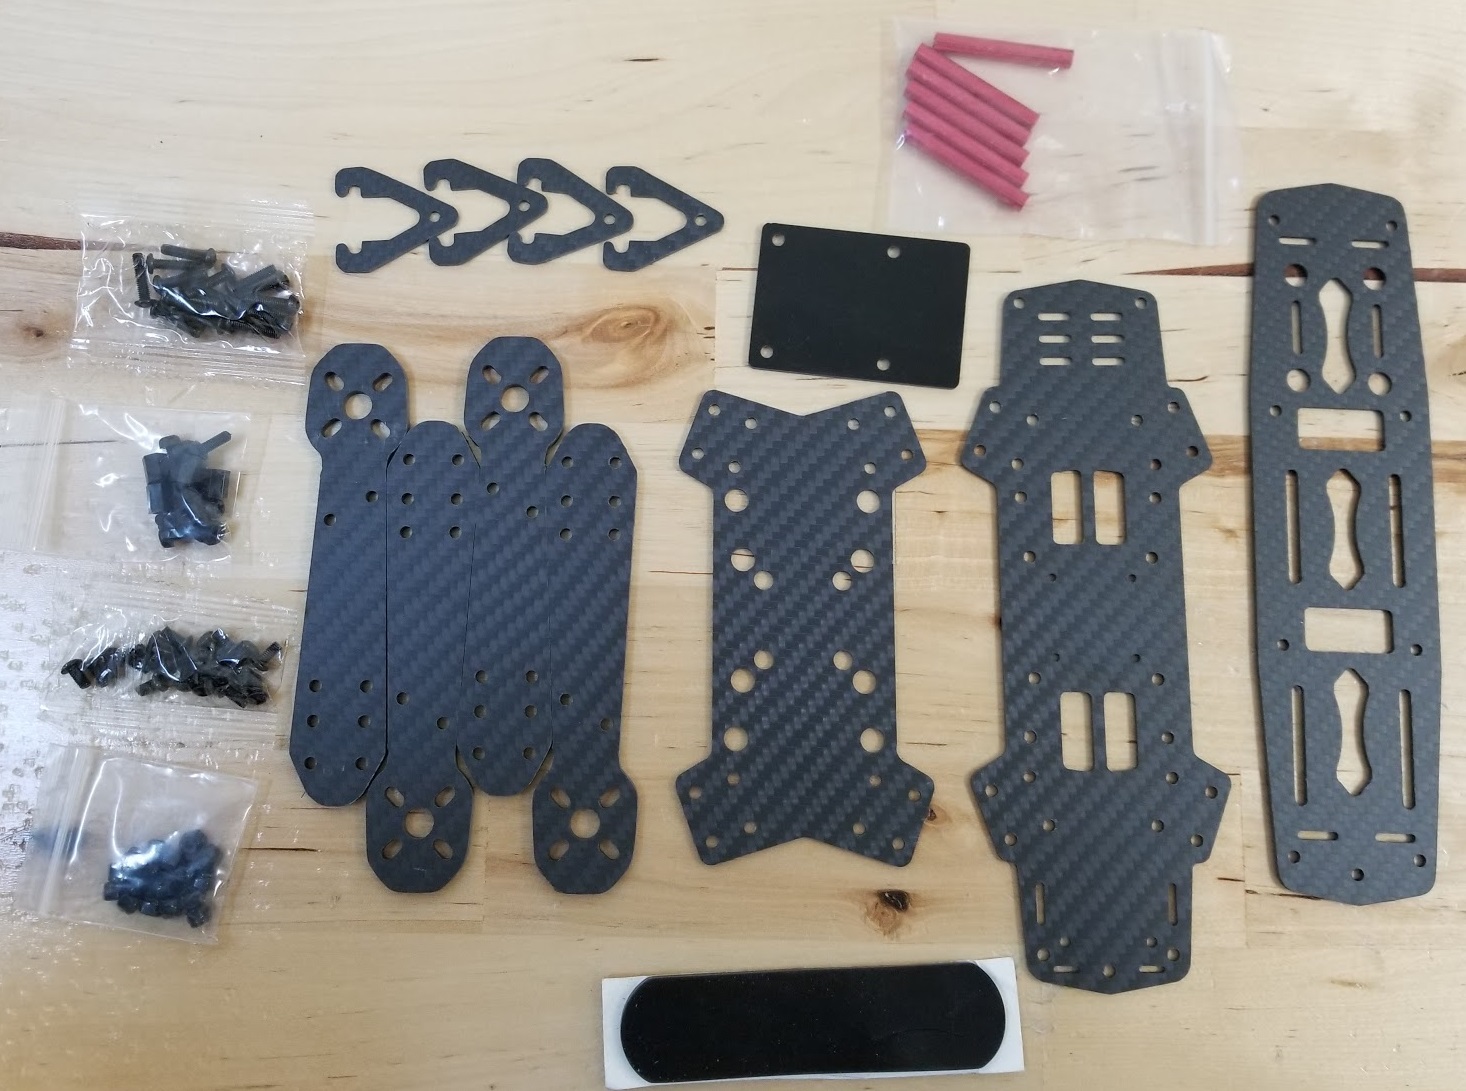
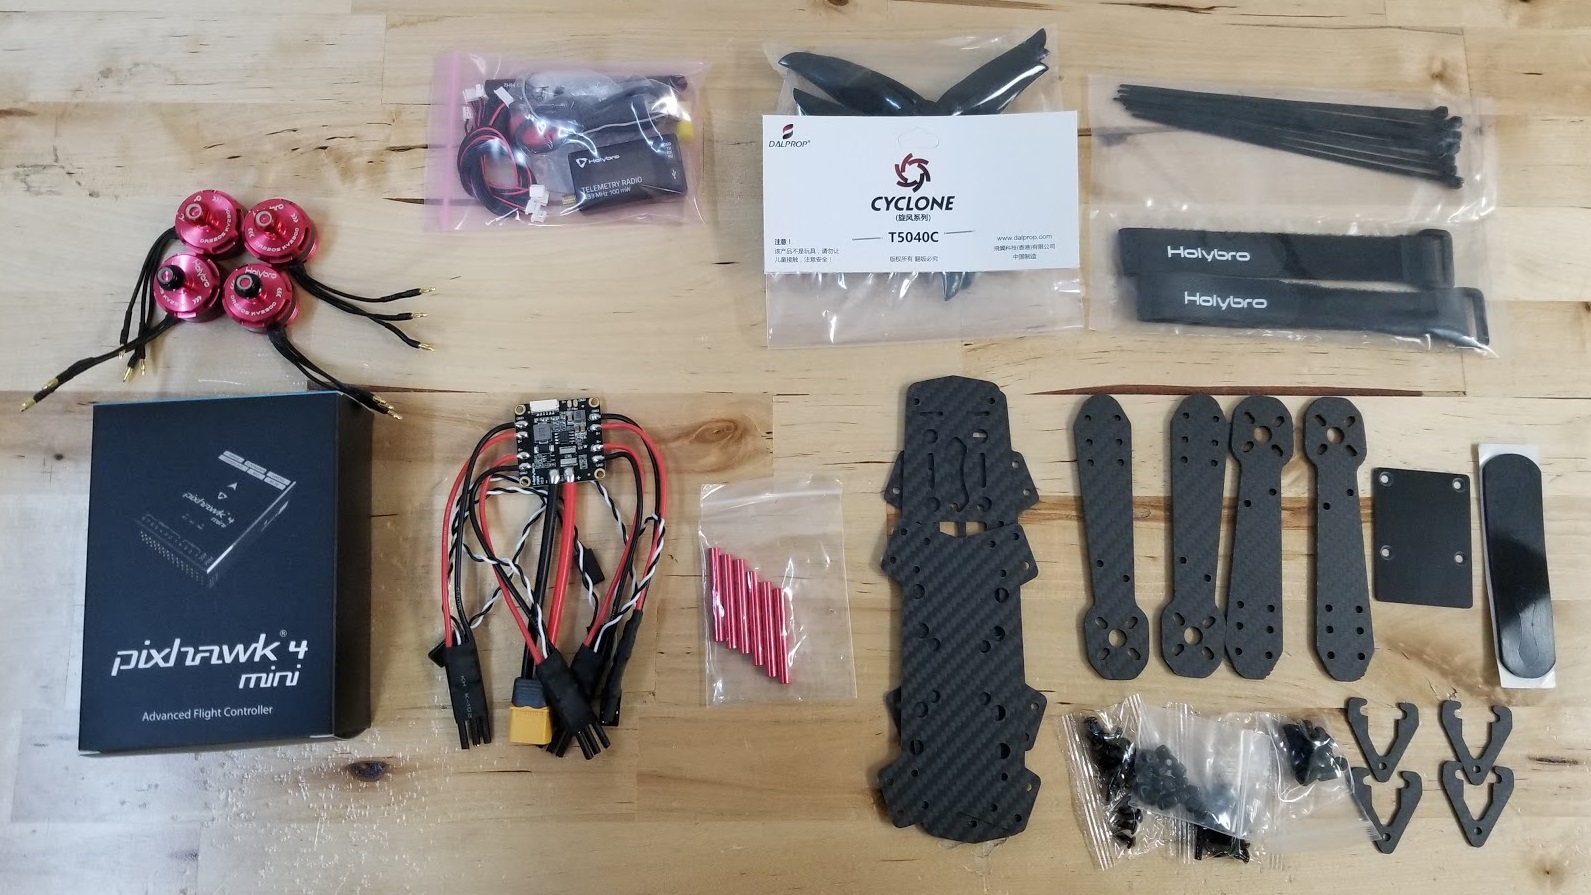
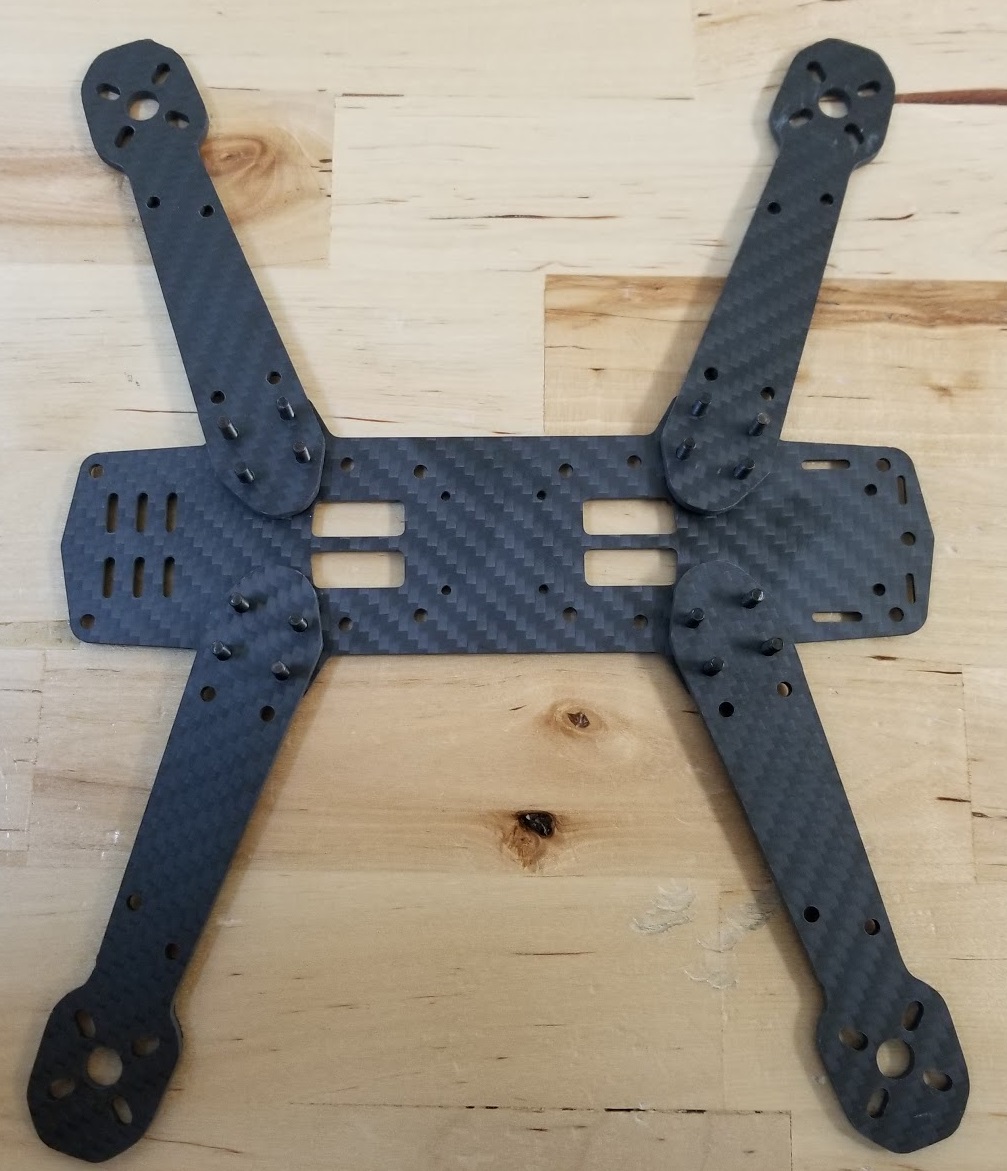
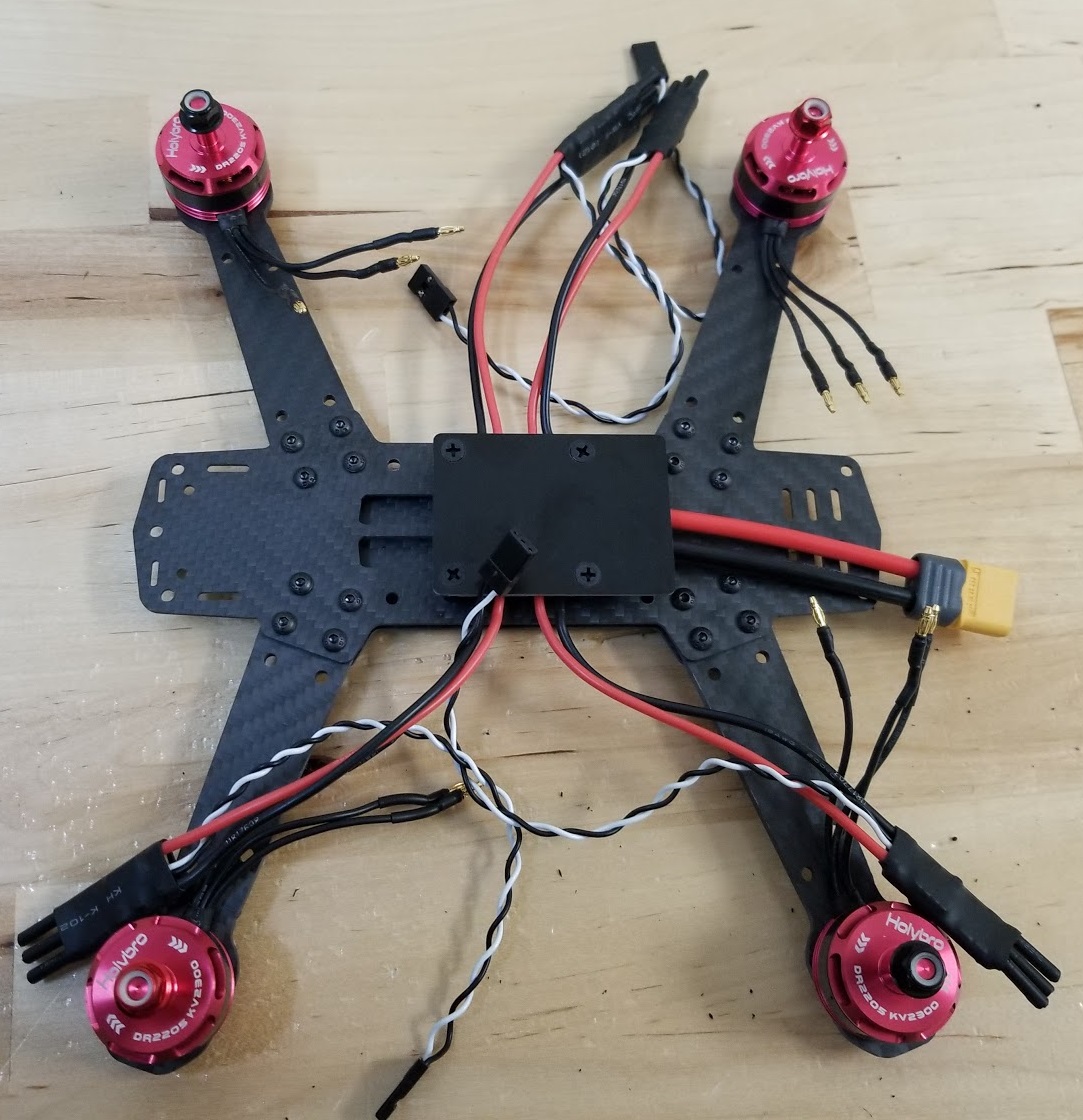
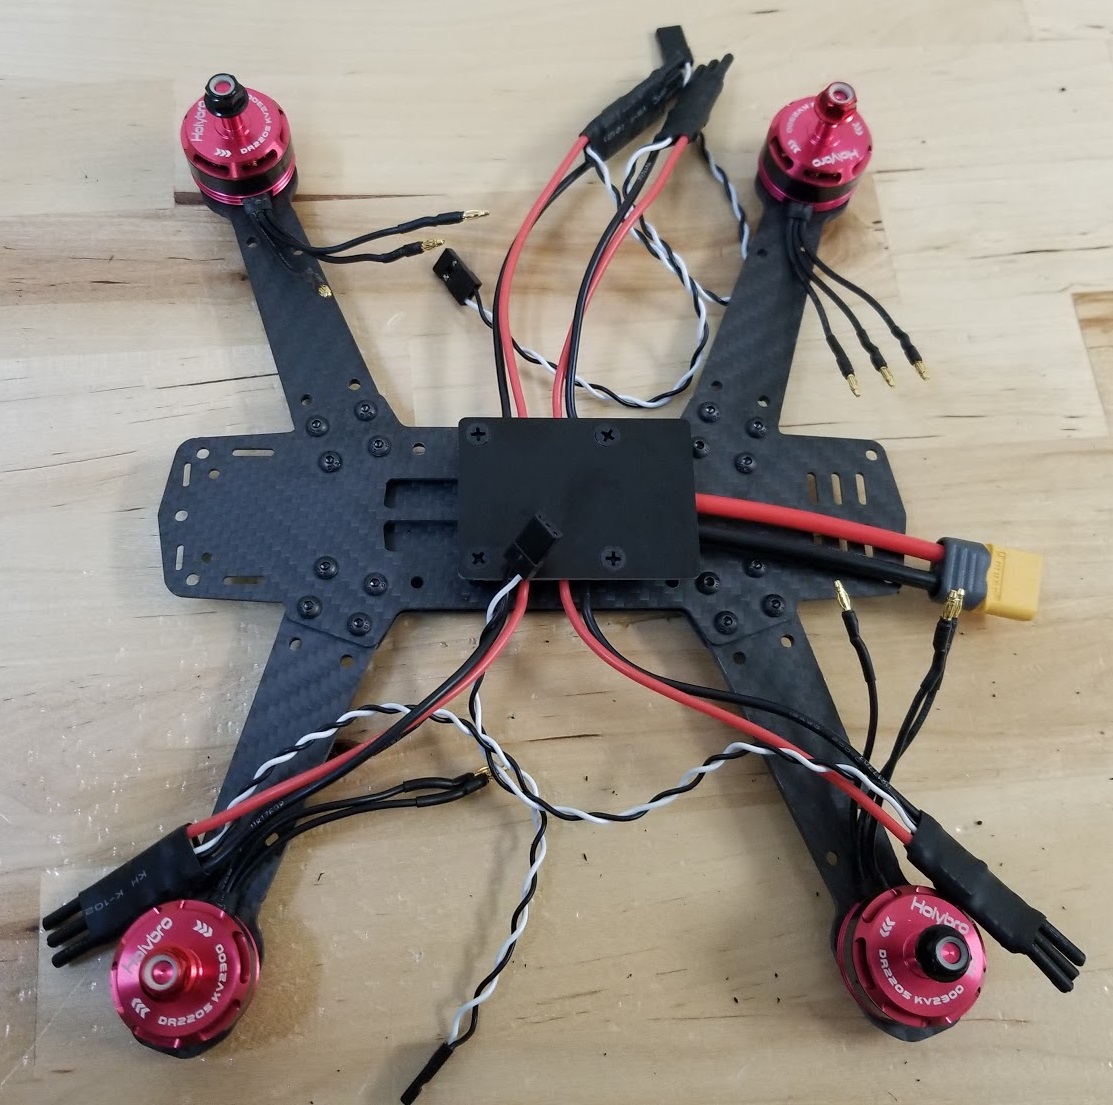
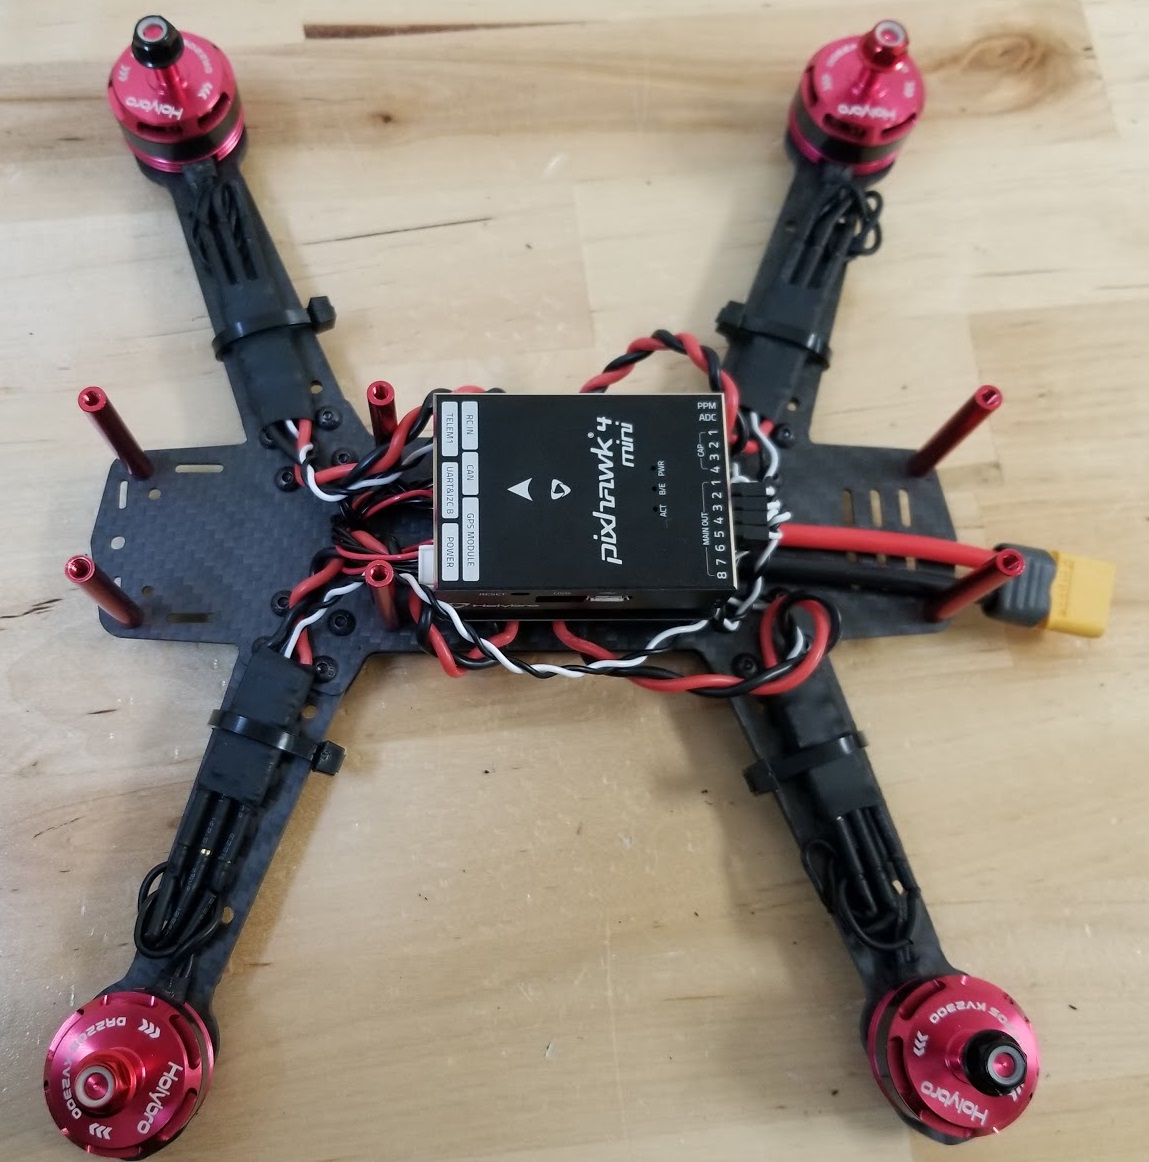
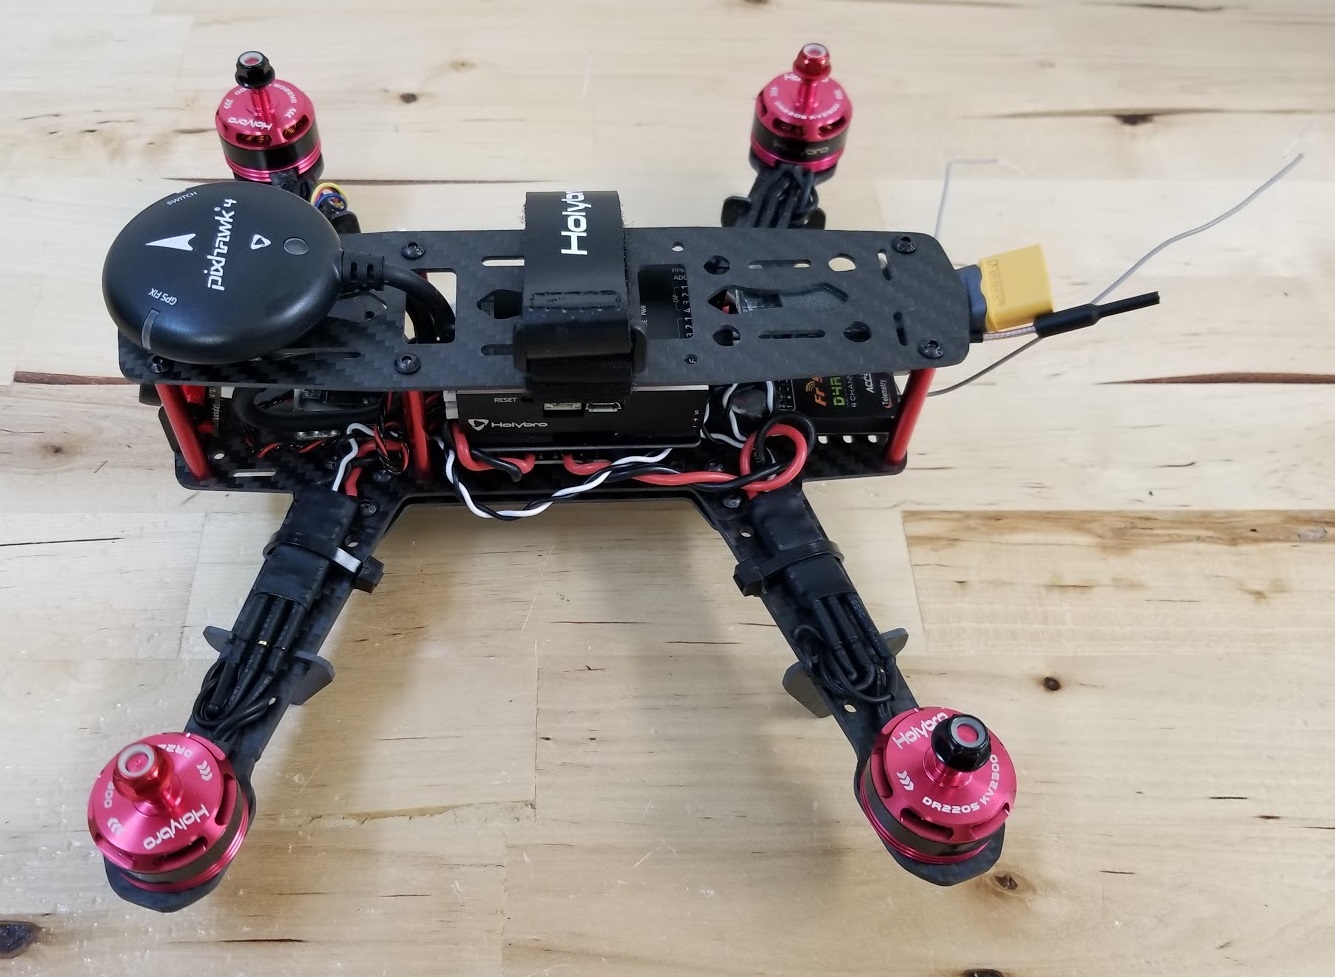
下图显示了框架和电子元件。
# 装配
组装框架的预计时间为 2 小时,安装自动驾驶仪和配置机身的预计时间为 1.5 小时。 QGroundControl.
# 所需工具
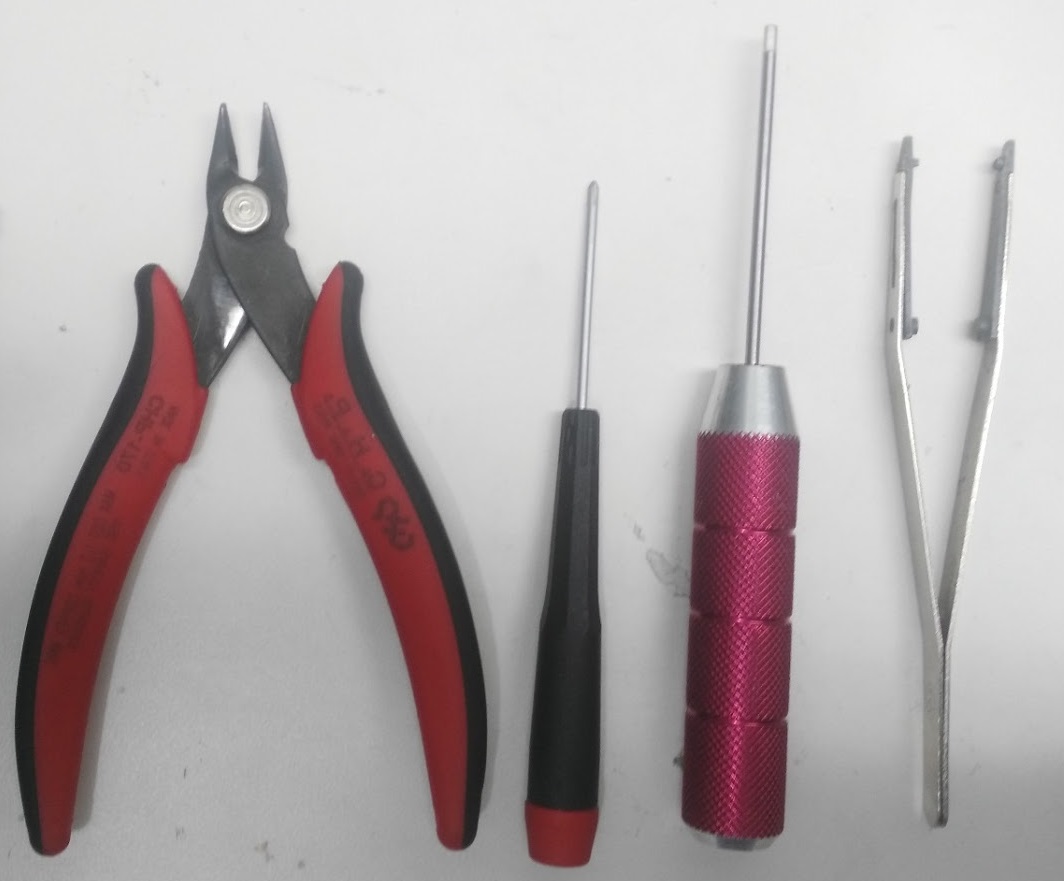
装配时使用了以下工具:
- 2.0 毫米六角螺丝刀
- 3 毫米十字螺丝刀
- 剪线钳
- 精密镊子
# 框架组件
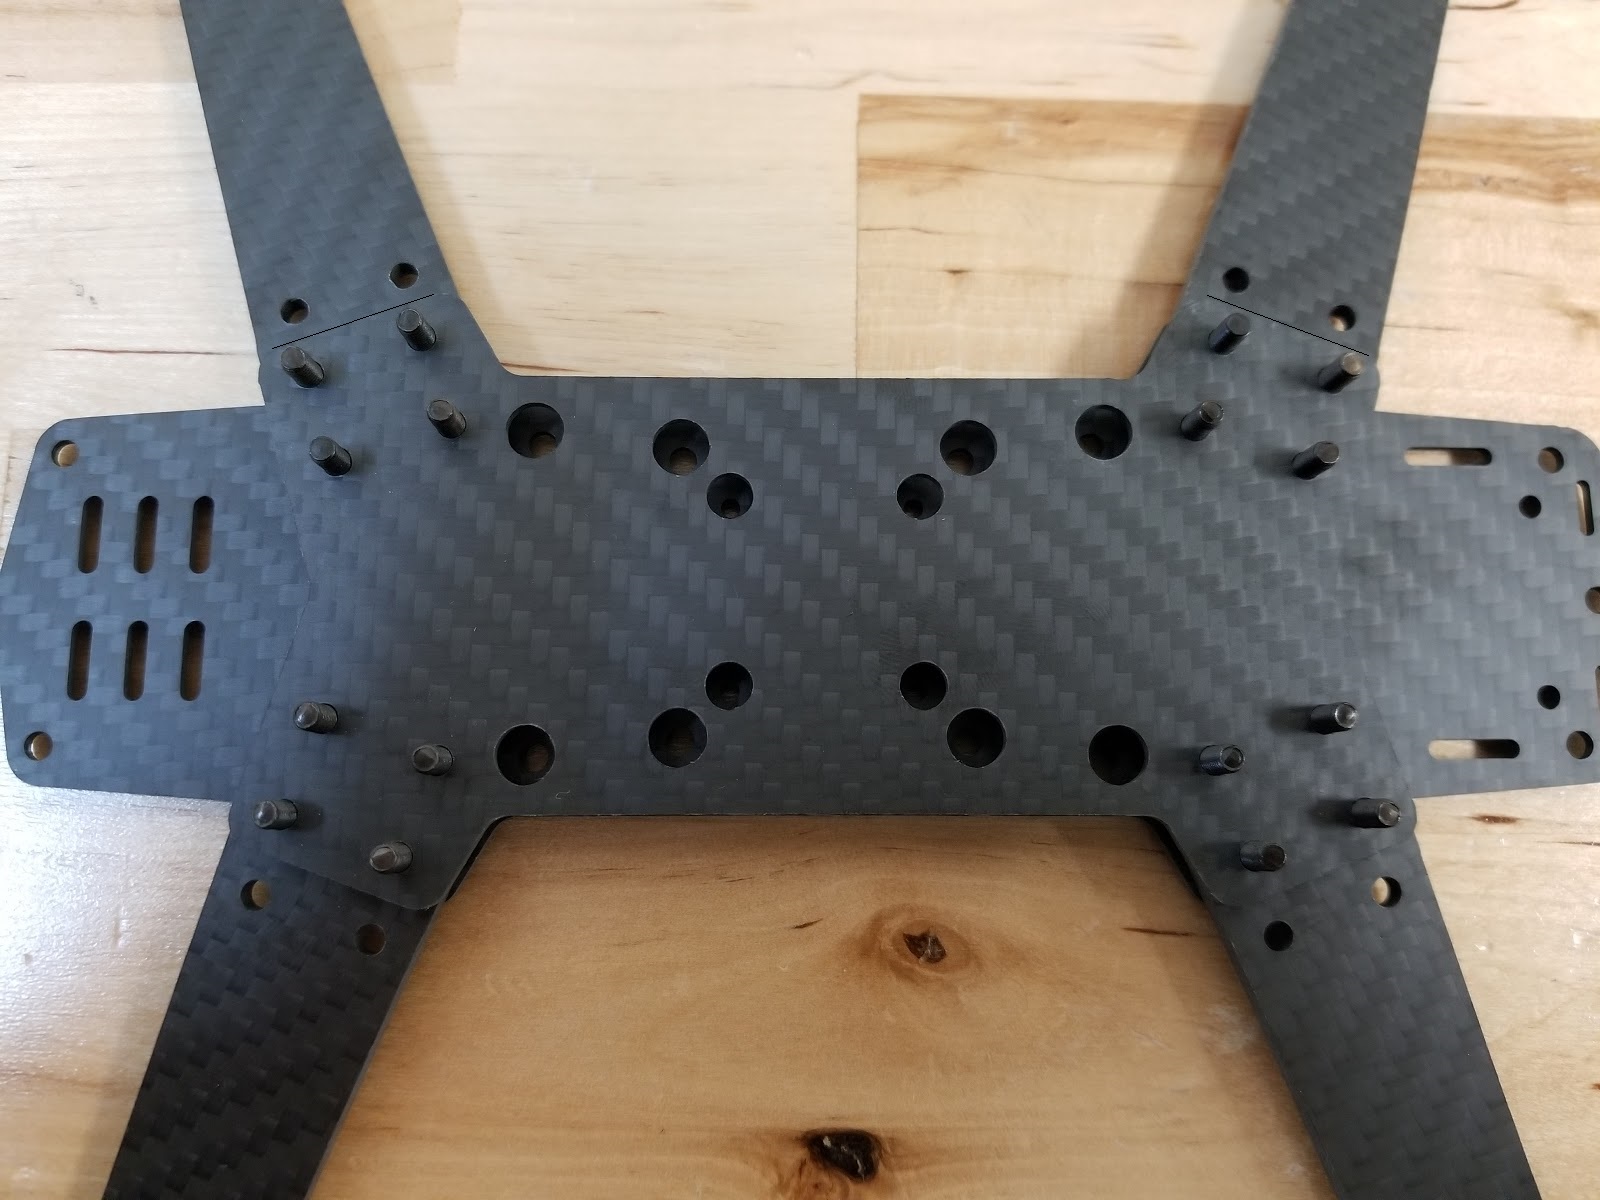
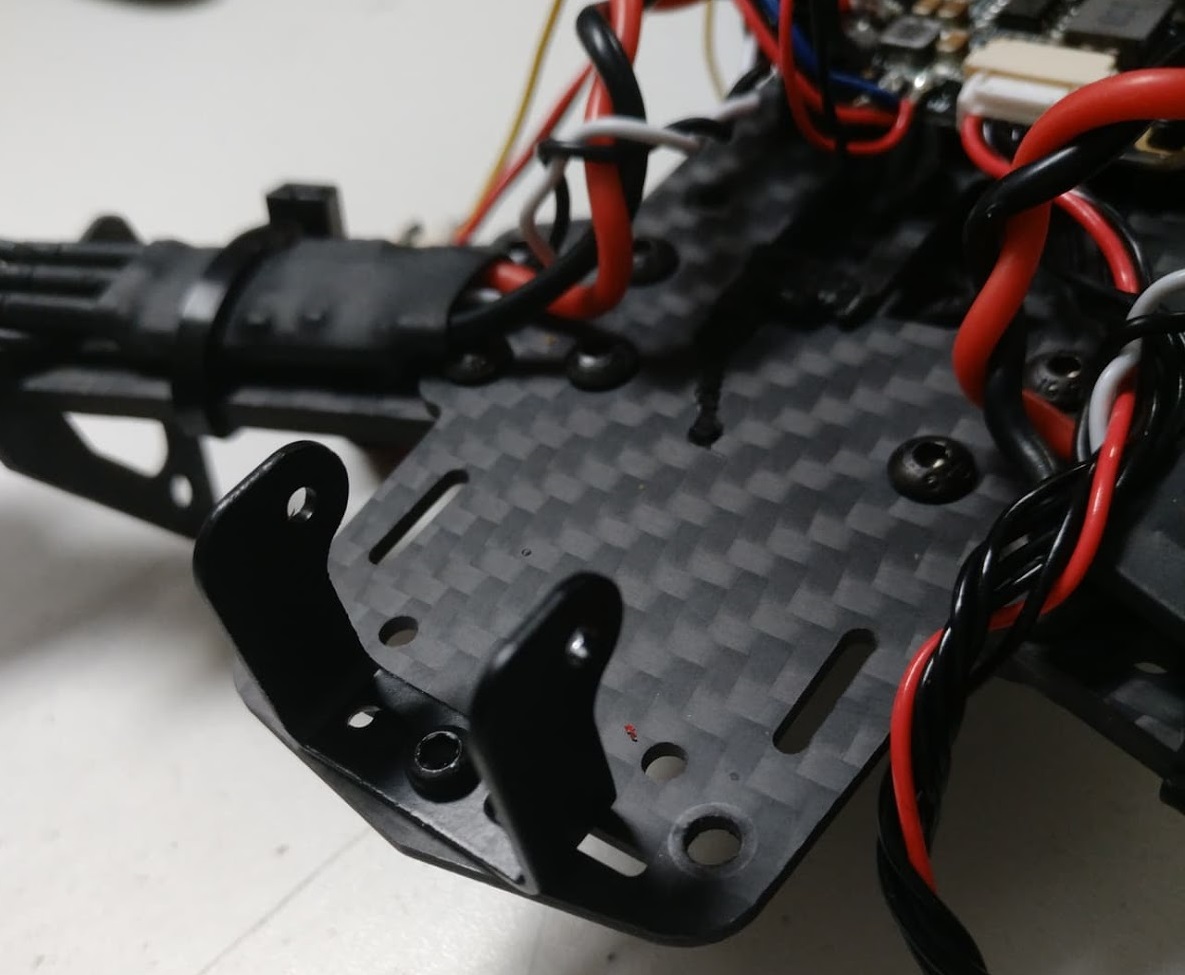
如图所示,用 15 毫米螺钉将支臂固定在按钮板上:
将短板套在手臂上
给 15 毫米螺钉装上螺母(如下一步所示)
将塑料螺钉插入指定孔中(注意,载具完成后,车架的这一部分朝下)。

将塑料螺母装到螺钉上(翻转过来,如图所示)
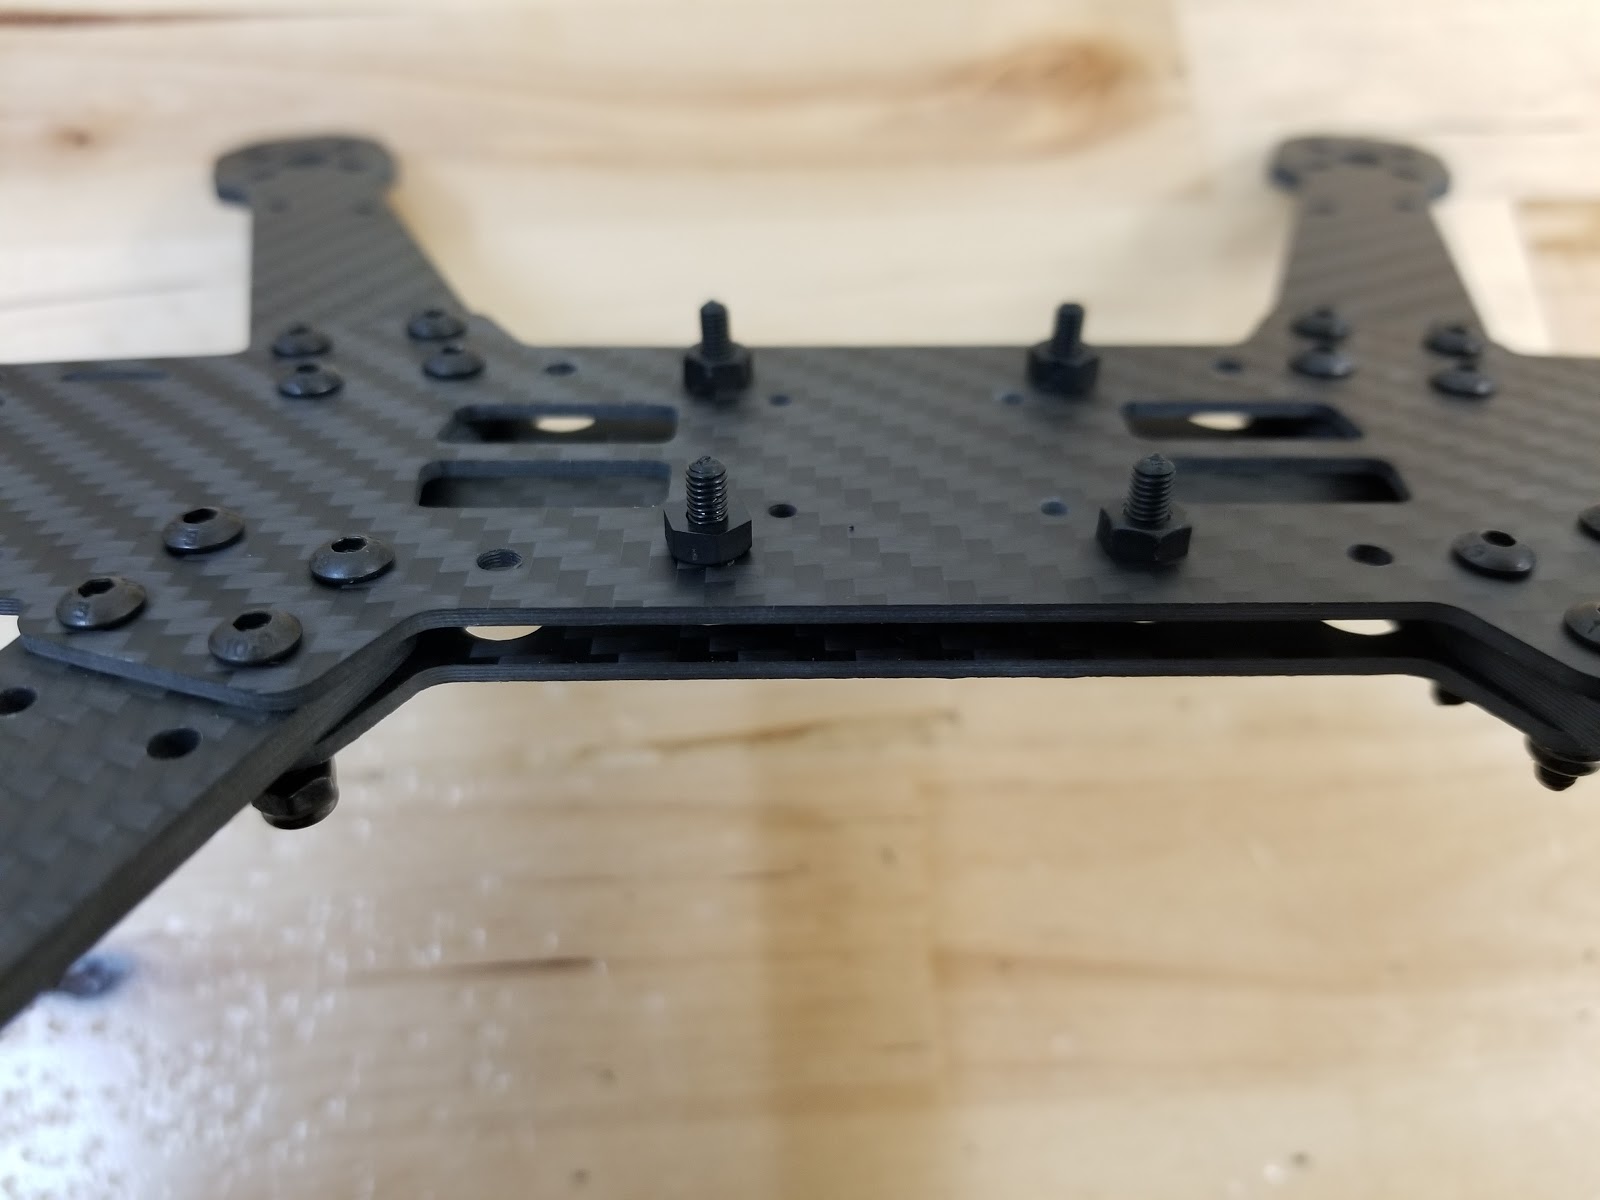
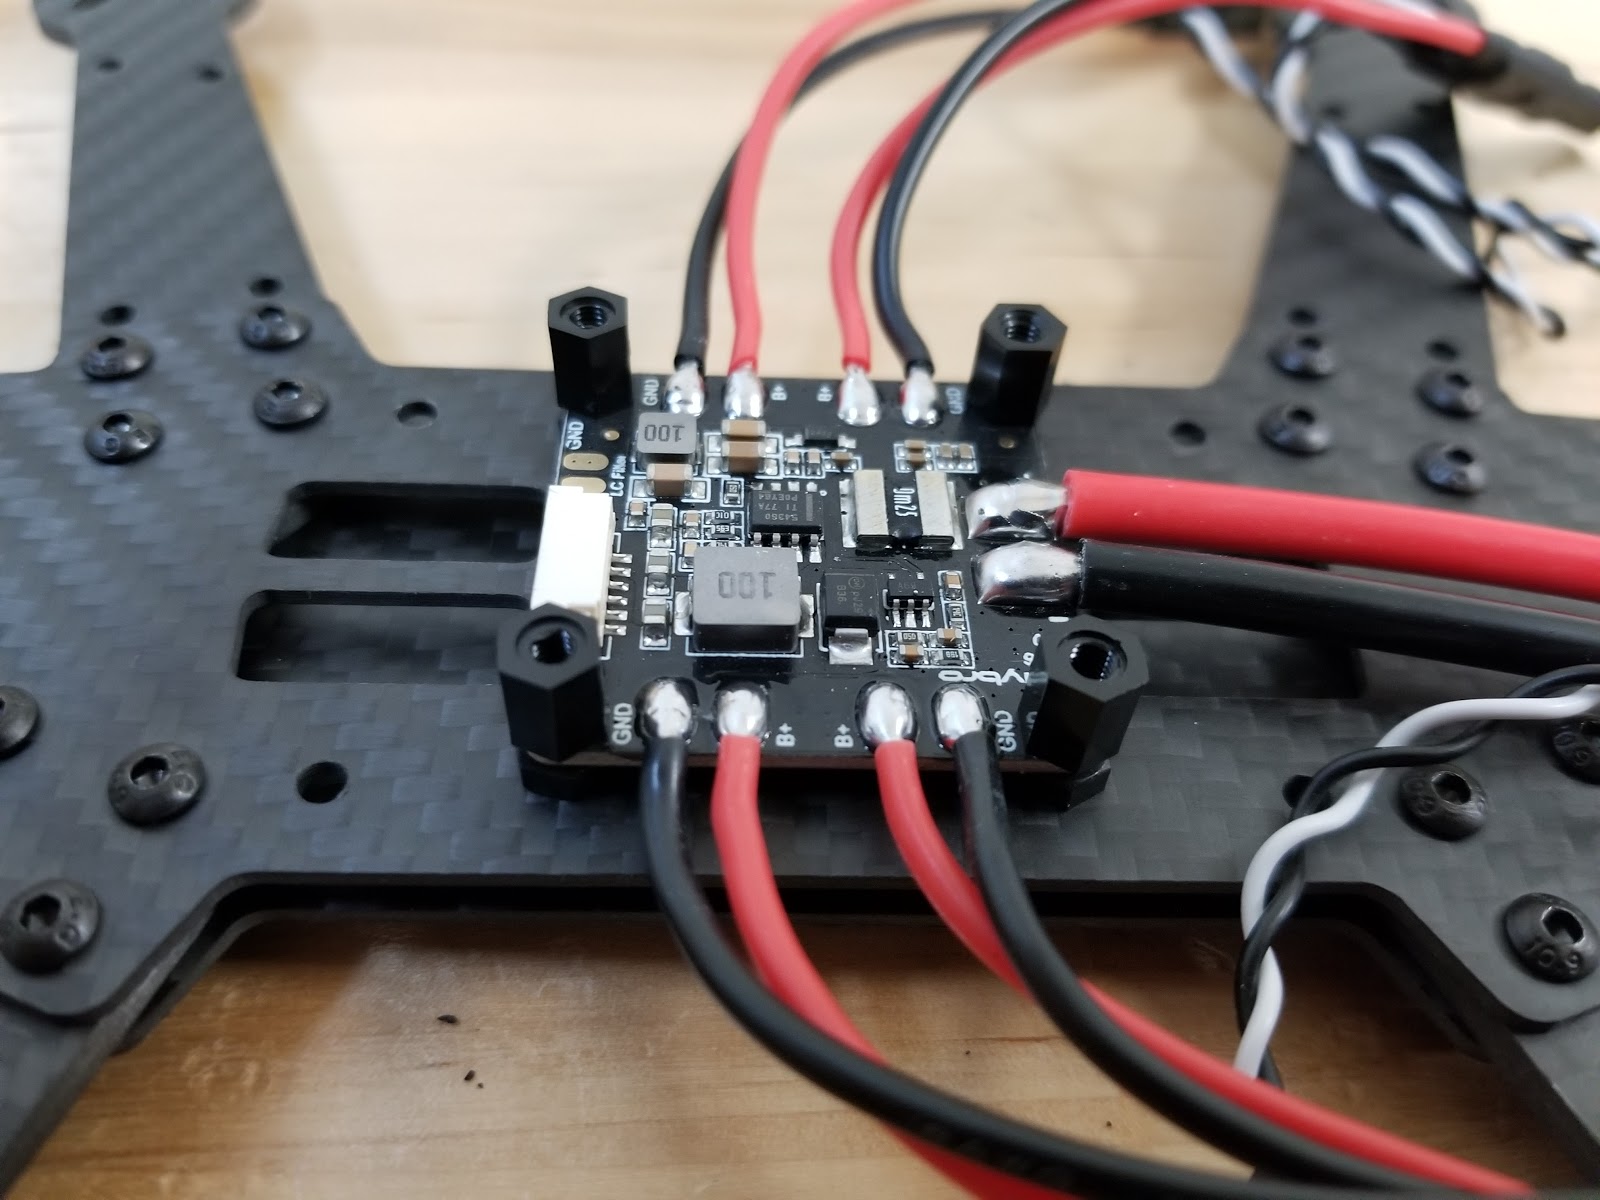
将电源模块放在塑料螺钉上,然后加上塑料支座
将飞行控制器板放在支座上(电源模块上方)
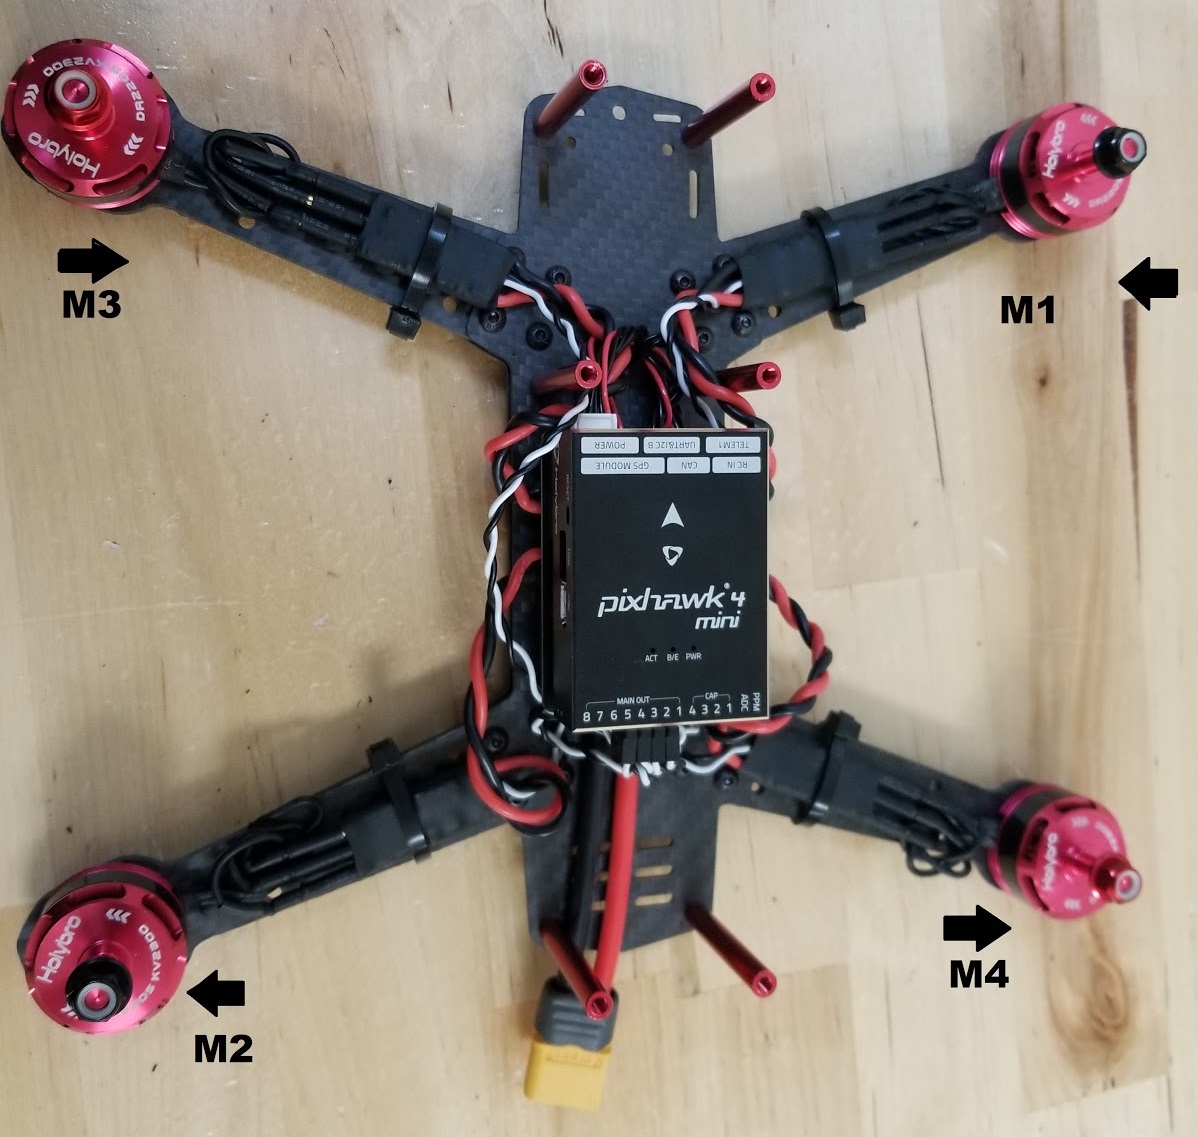
安装电机。电机上有指示旋转方向的箭头。
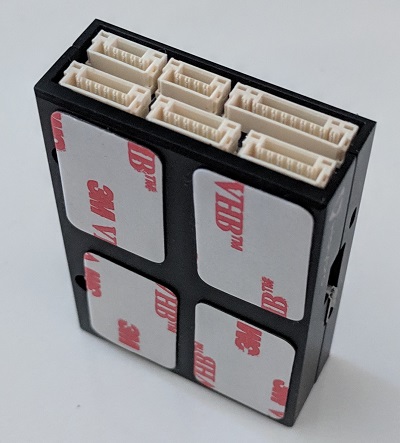
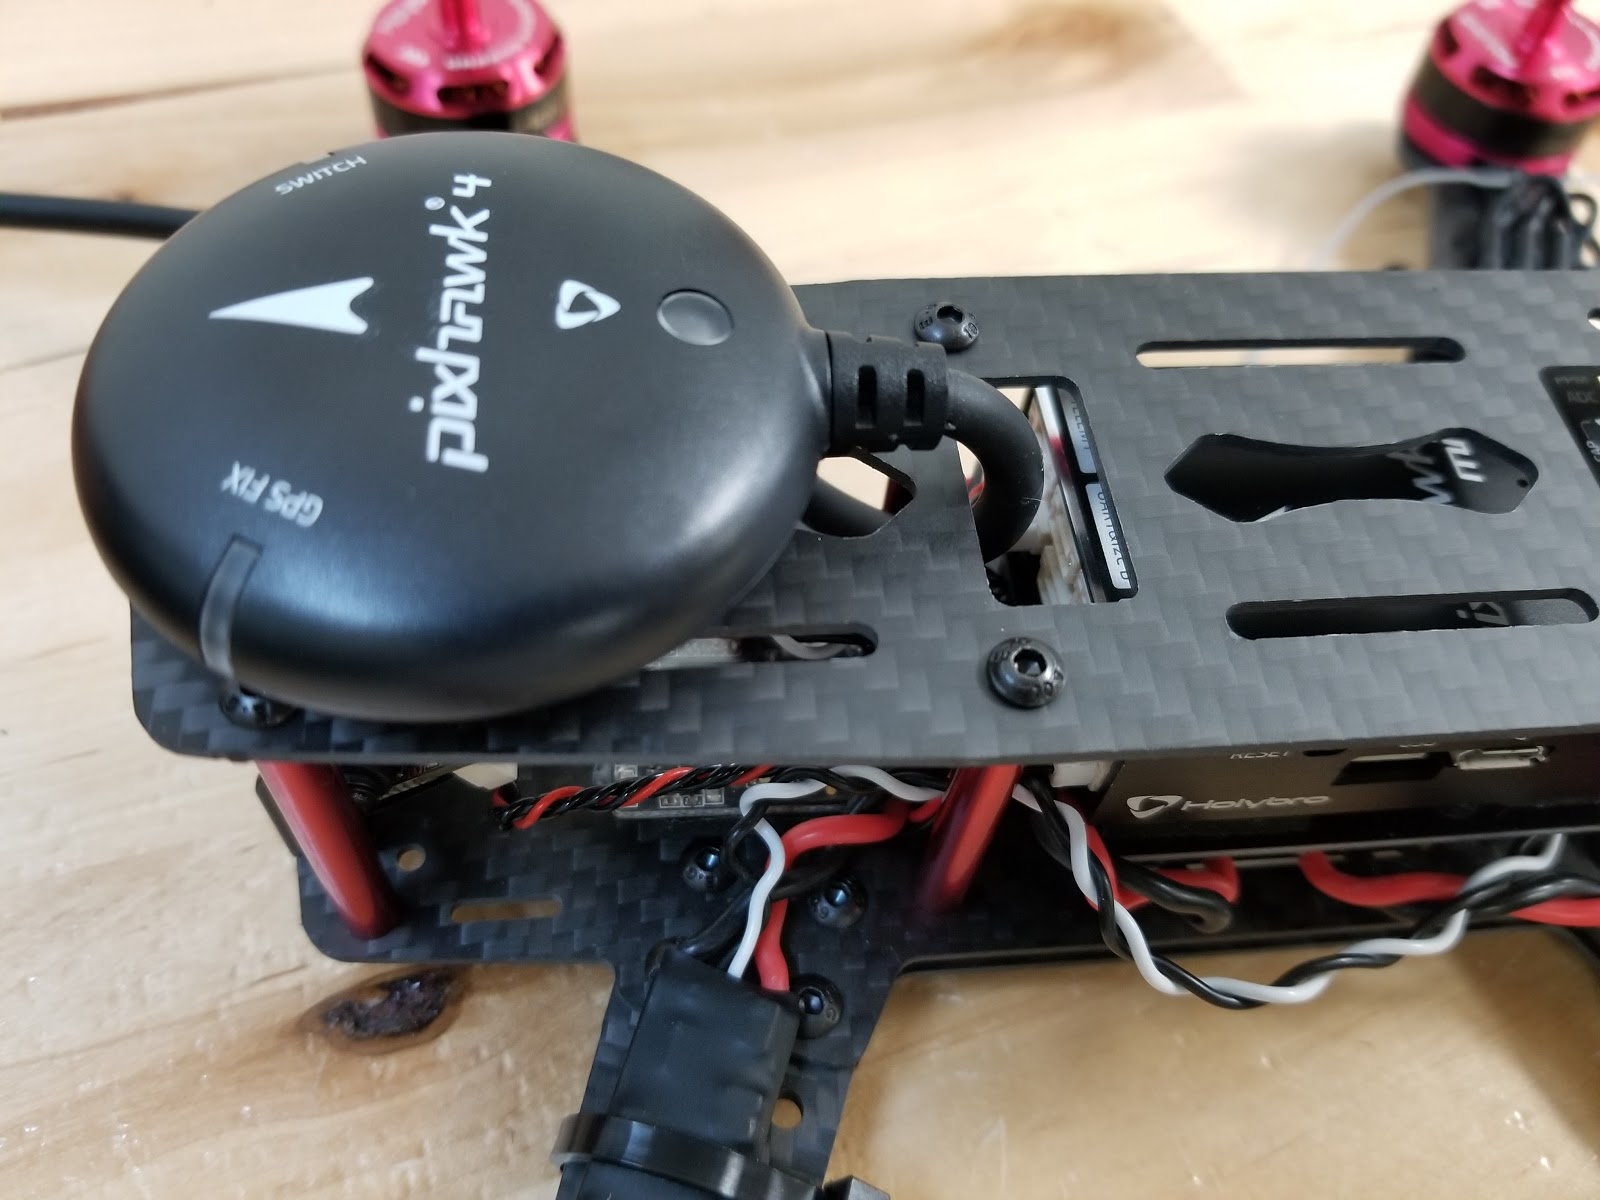
使用套件中的双面胶带粘贴 Pixhawk 4 Mini 到飞行控制器板上。
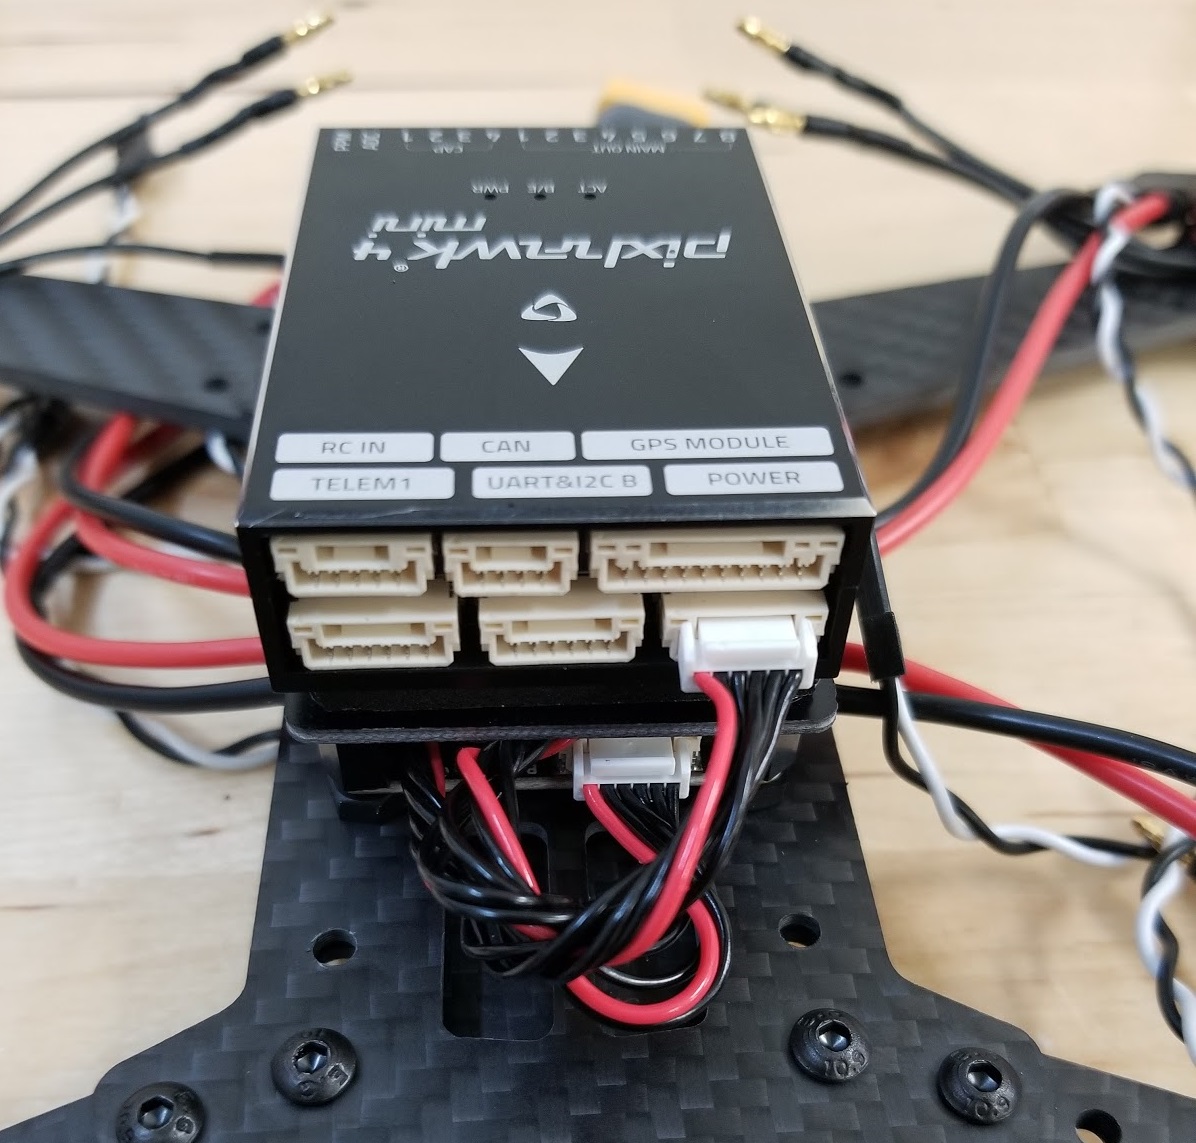
将电源模块的"电源"电缆连接到 Pixhawk 4 mini.
将铝支座安装到按钮板上
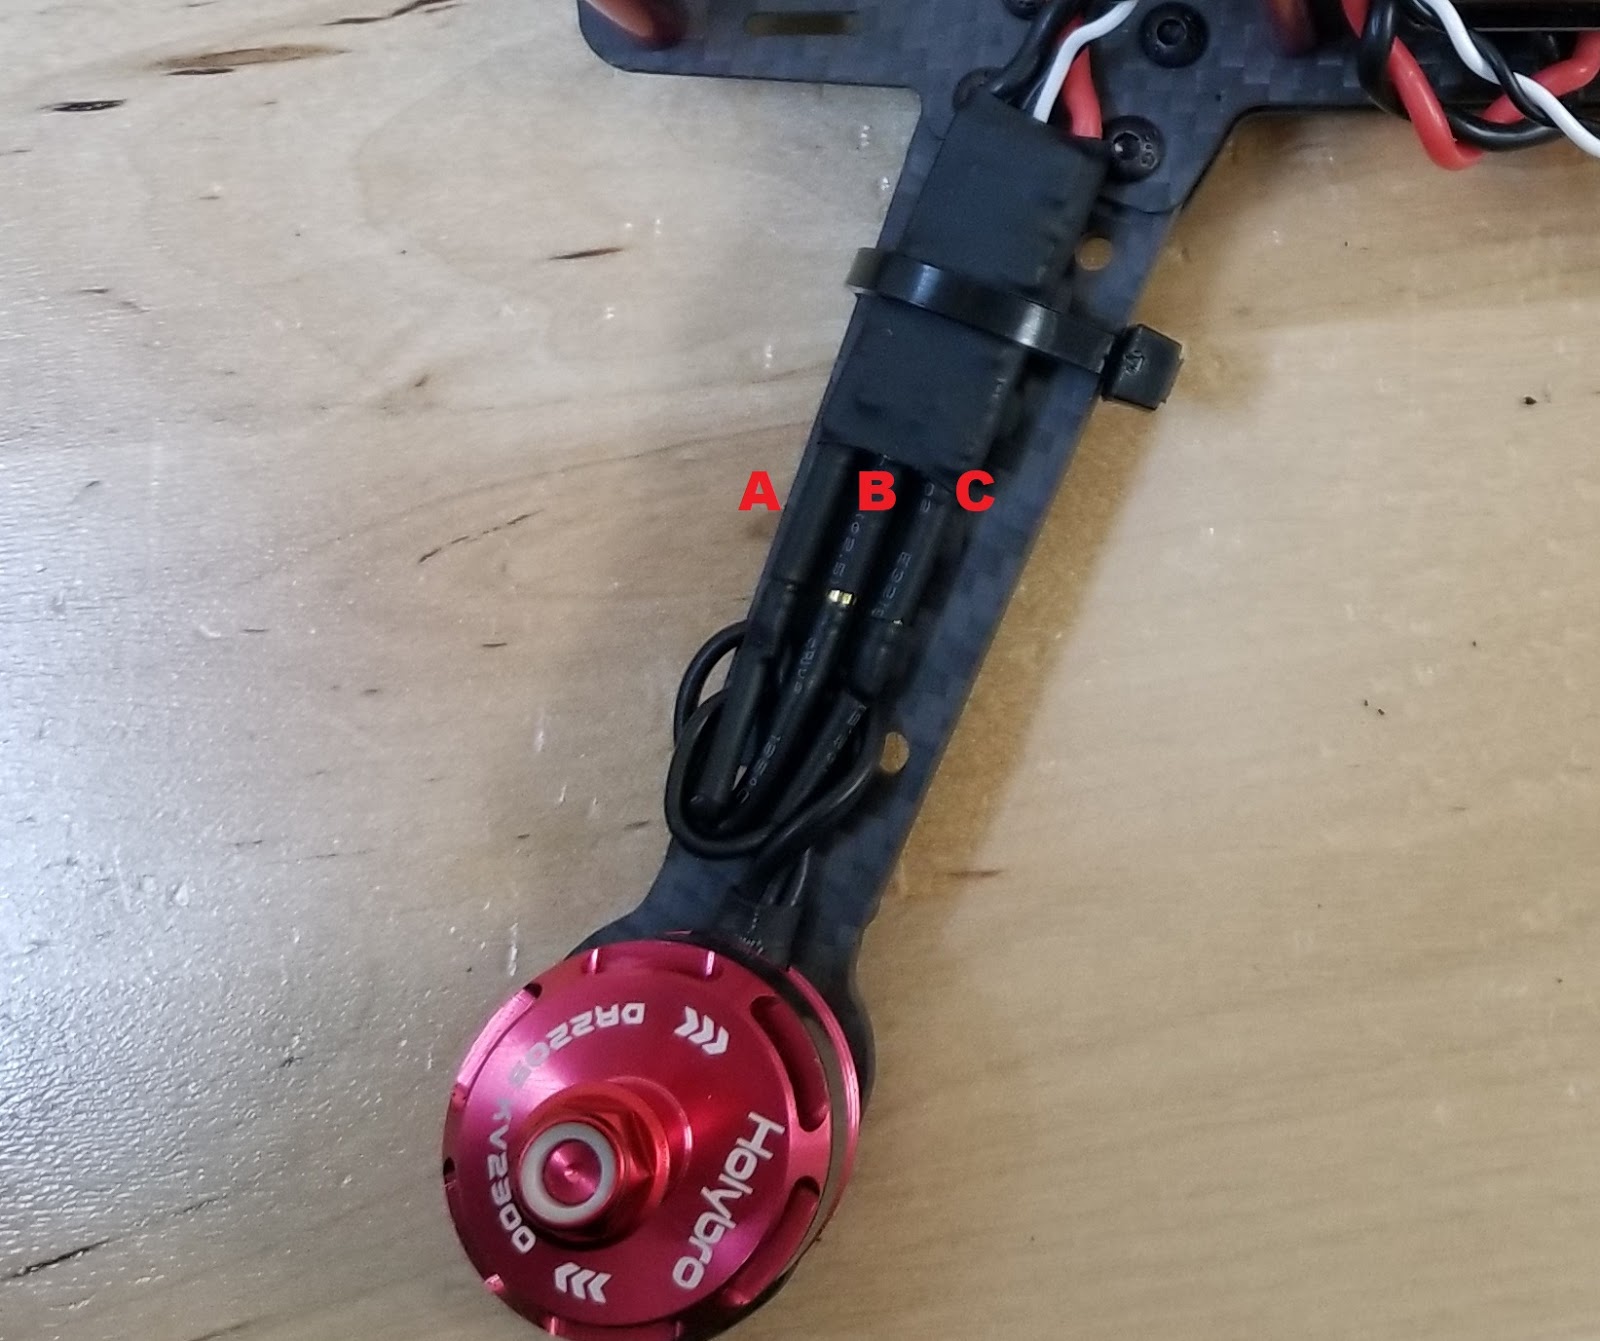
将 Esc 与电机连接并保持。图中显示了电机的顺序和旋转方向。
将电机连接到电调上,确保电机转向正确的一侧,如果电机转向相反的一侧,则将电缆线 A 改为电调的焊盘 C,C 改为焊盘 A。
警告
卸下推进器后测试电机方向。
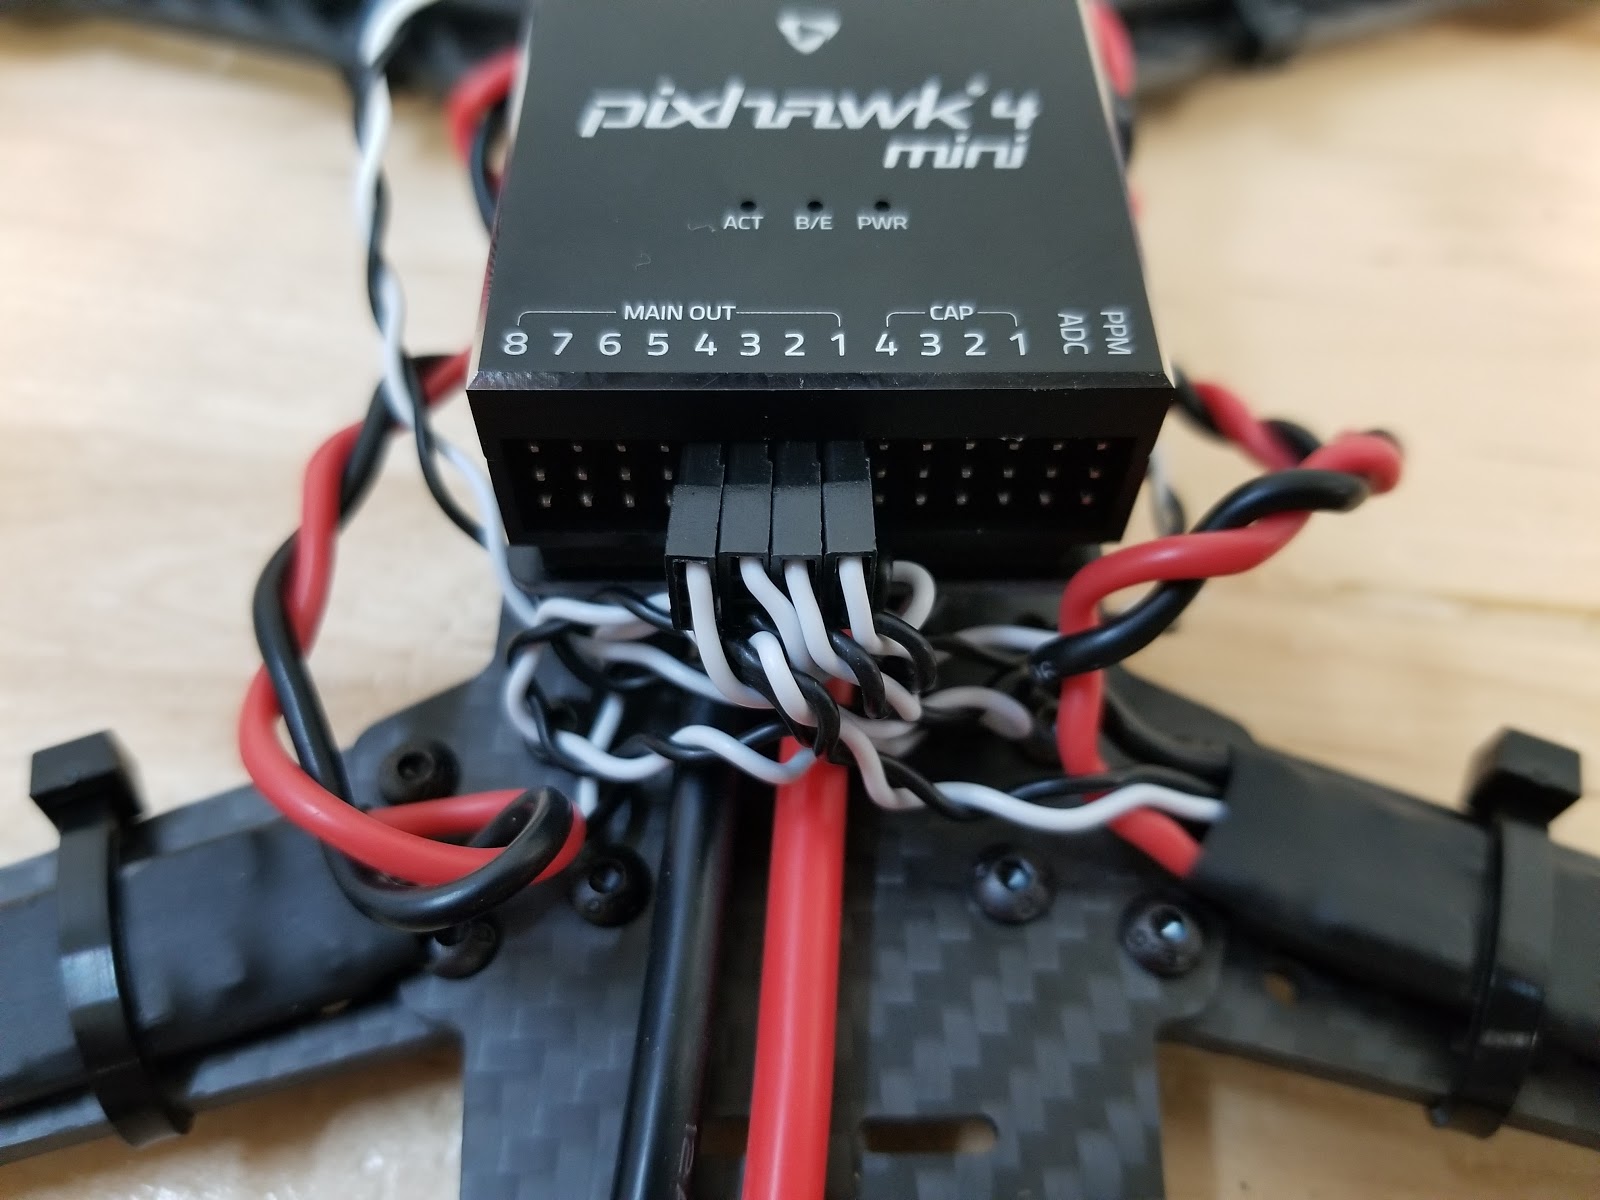
按照正确的顺序将信号电调电缆连接到 Pixhawk 的 PWM 输出端(见上图)
连接接收器。
如果使用 PPM 接收器,则连接至 PPM 端口。
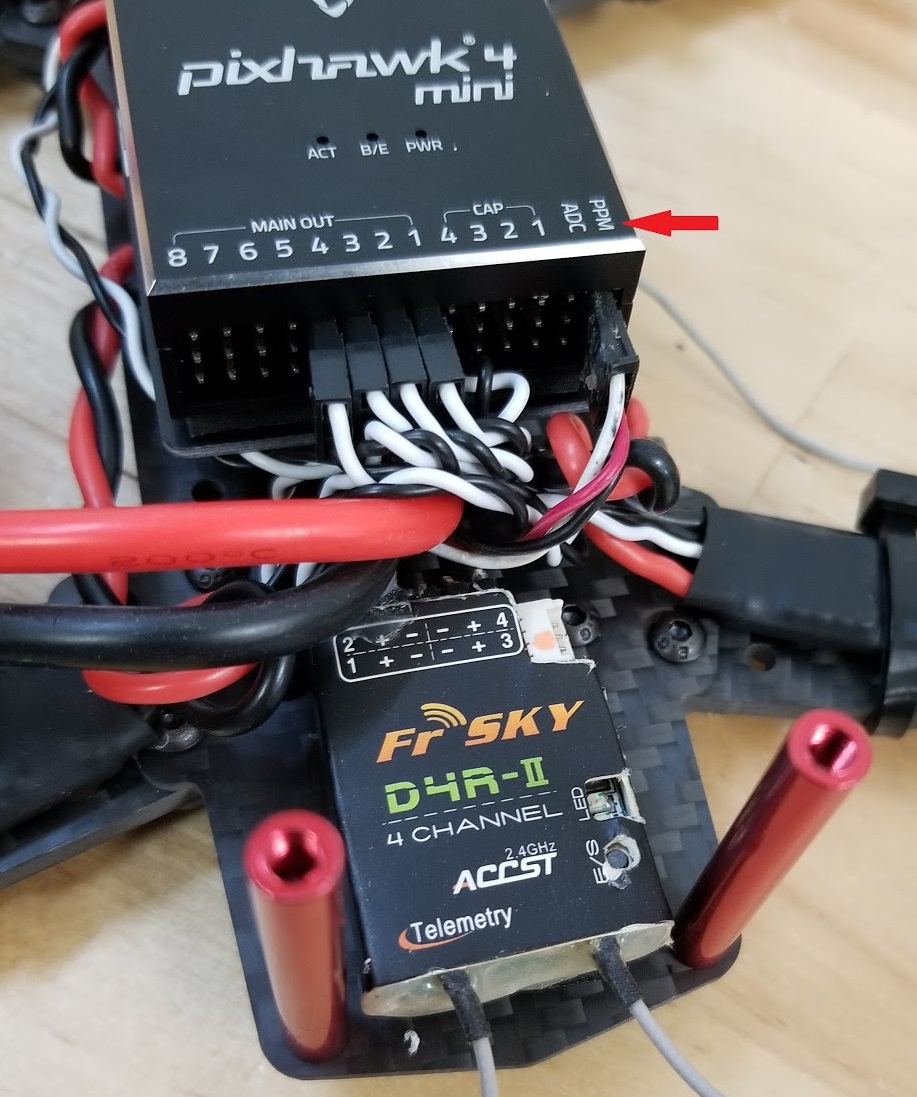
如果使用 SBUS 接收器,则连接至 RC IN 端口
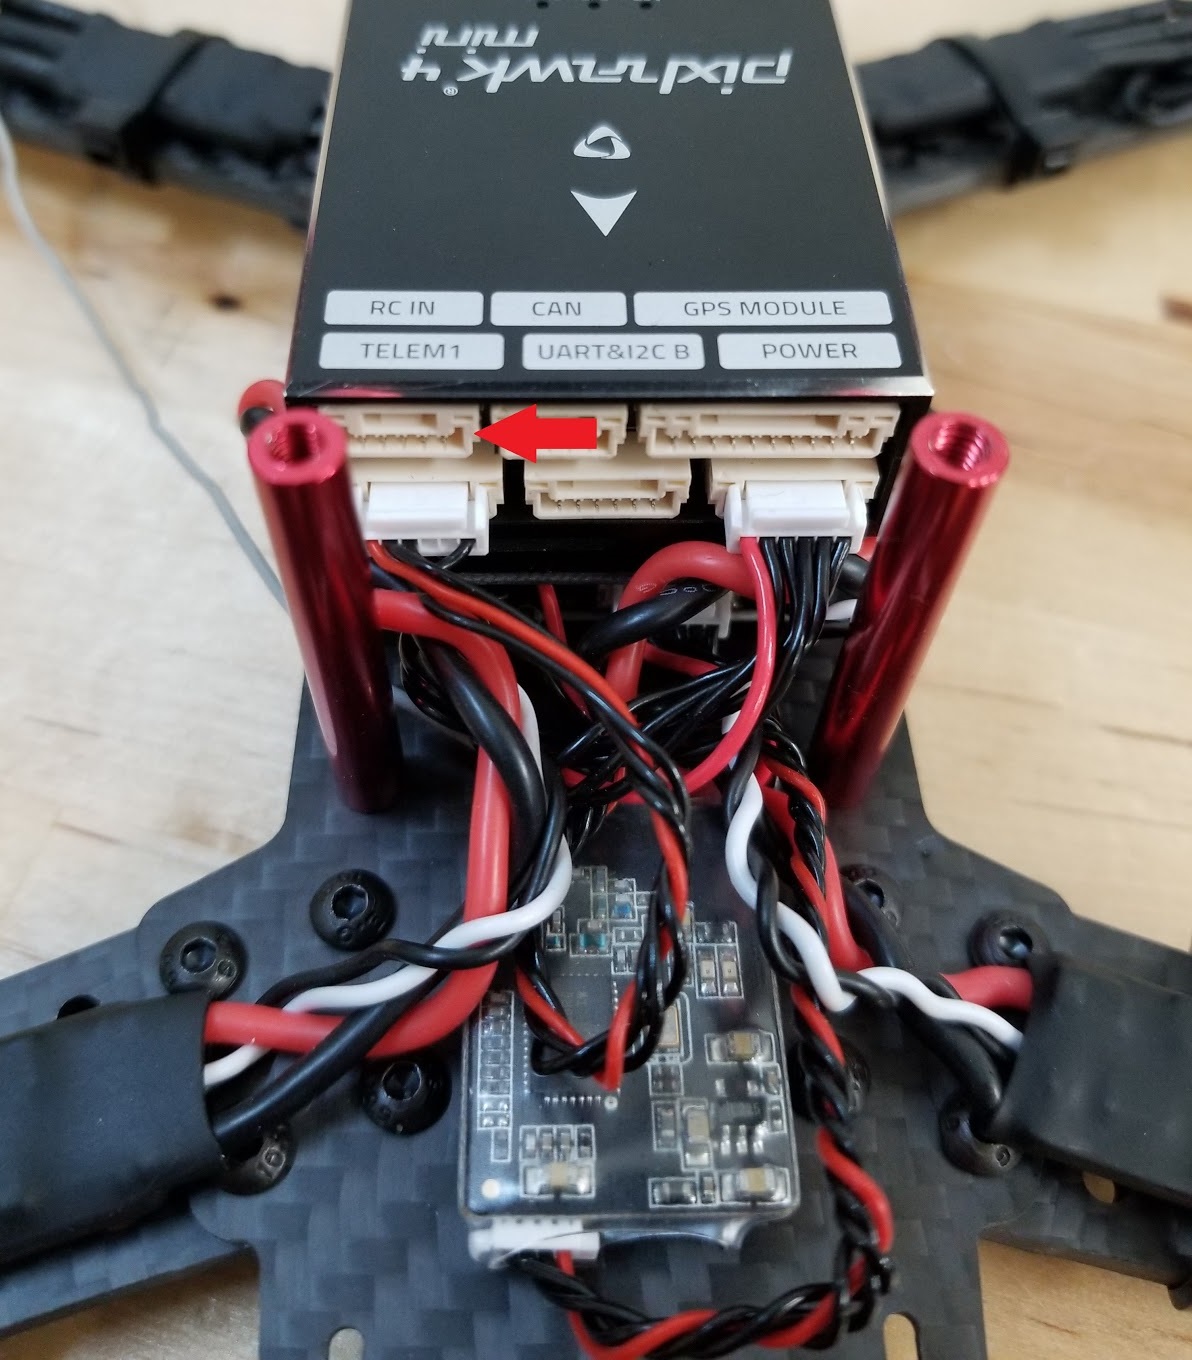
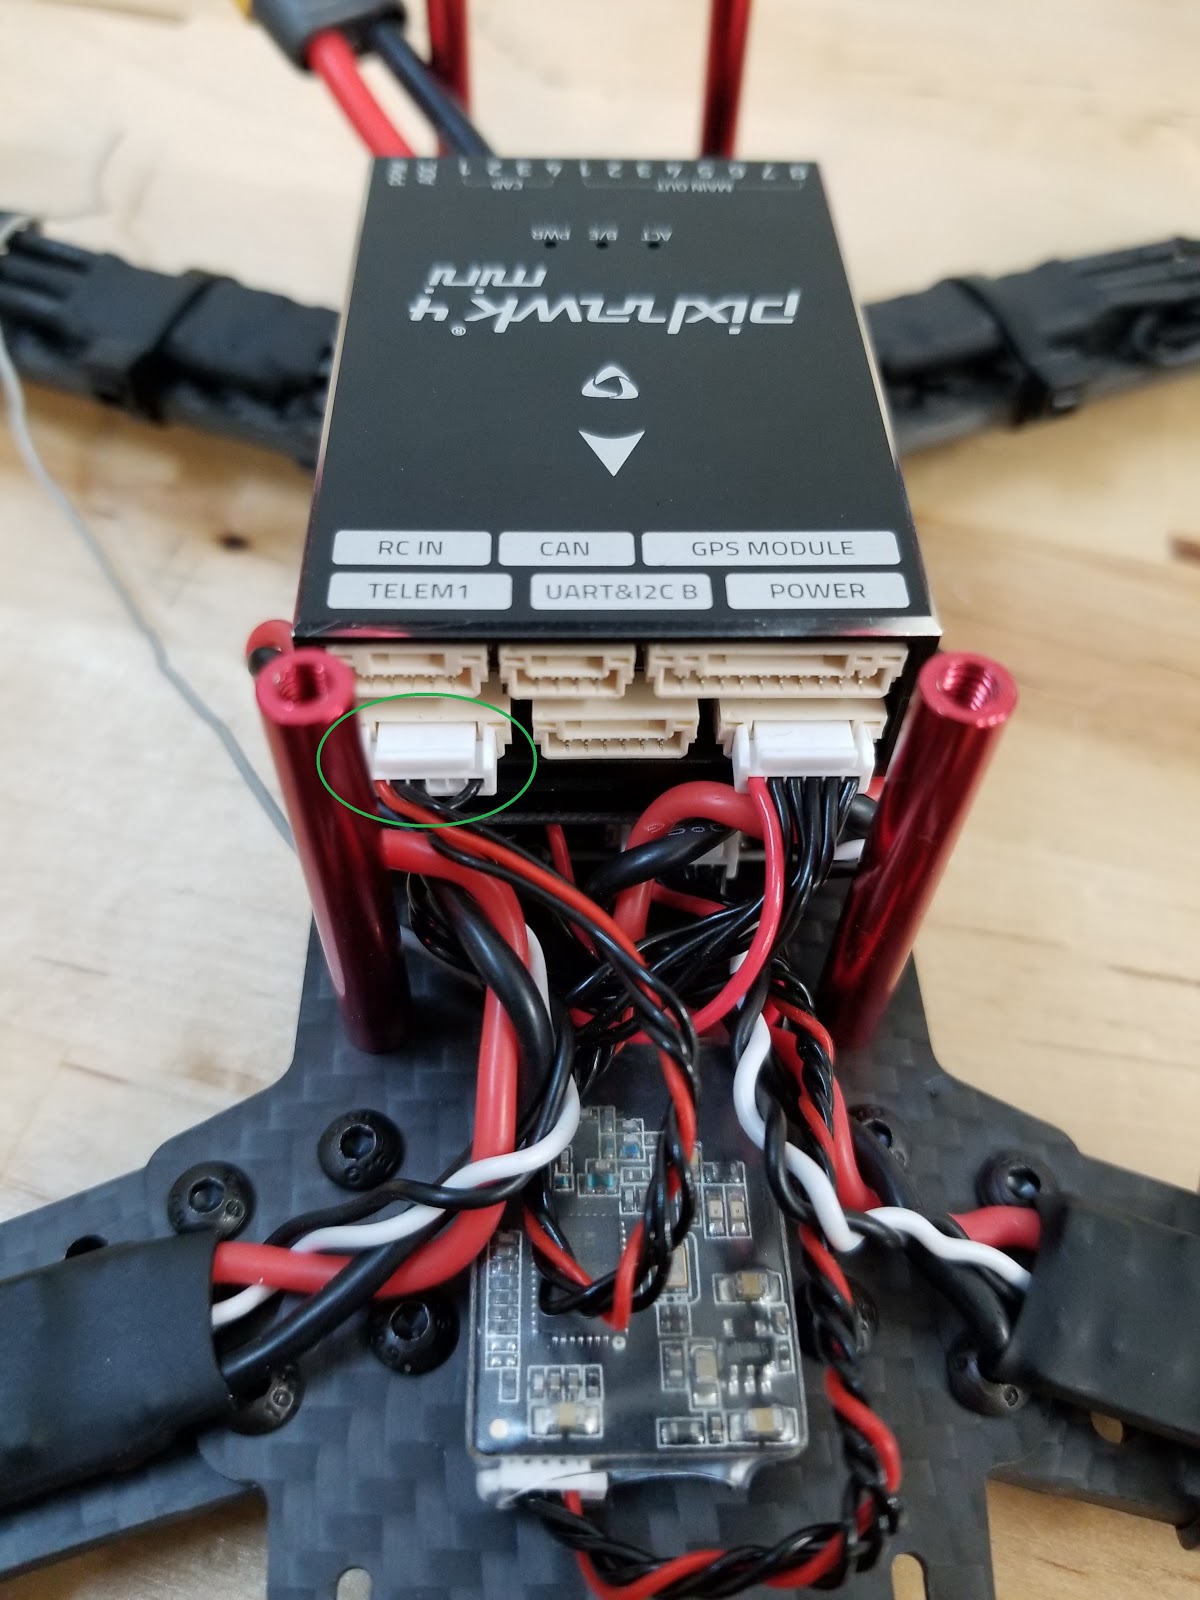
连接遥测模块。用双面胶带粘贴模块并连接到遥测端口上。
连接 GPS 模块
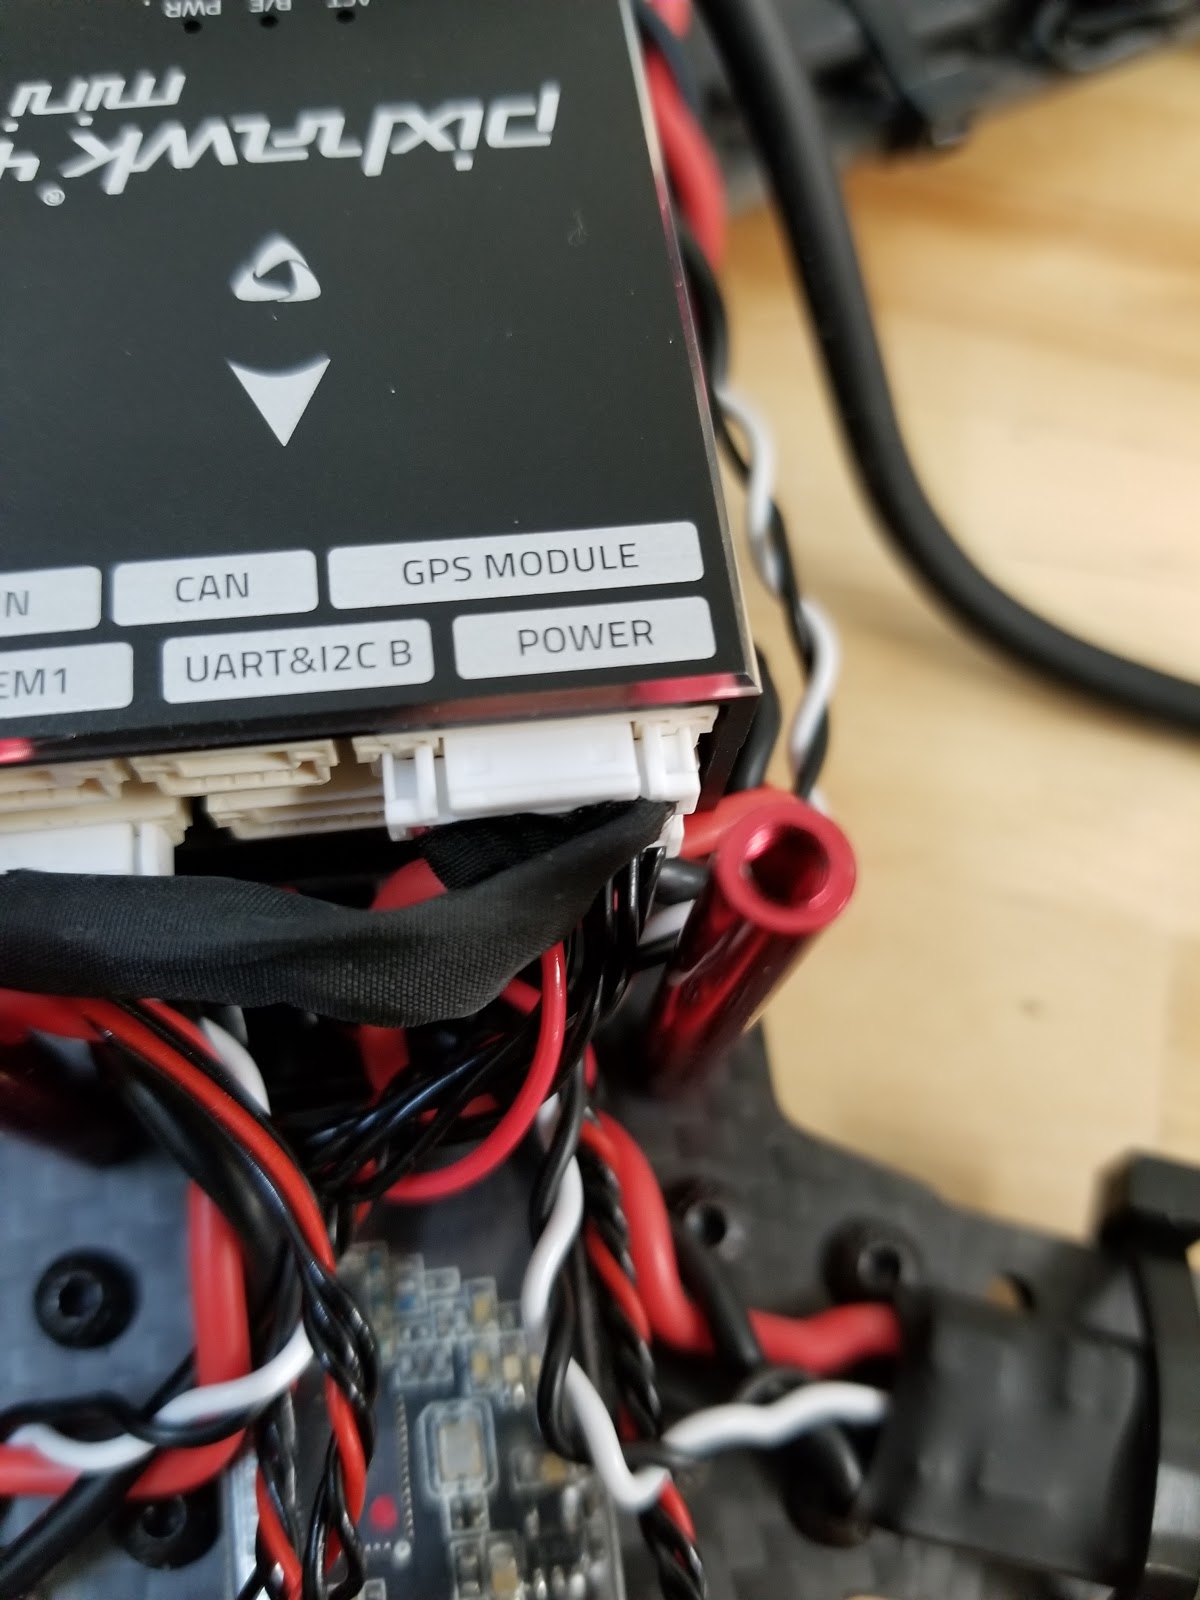
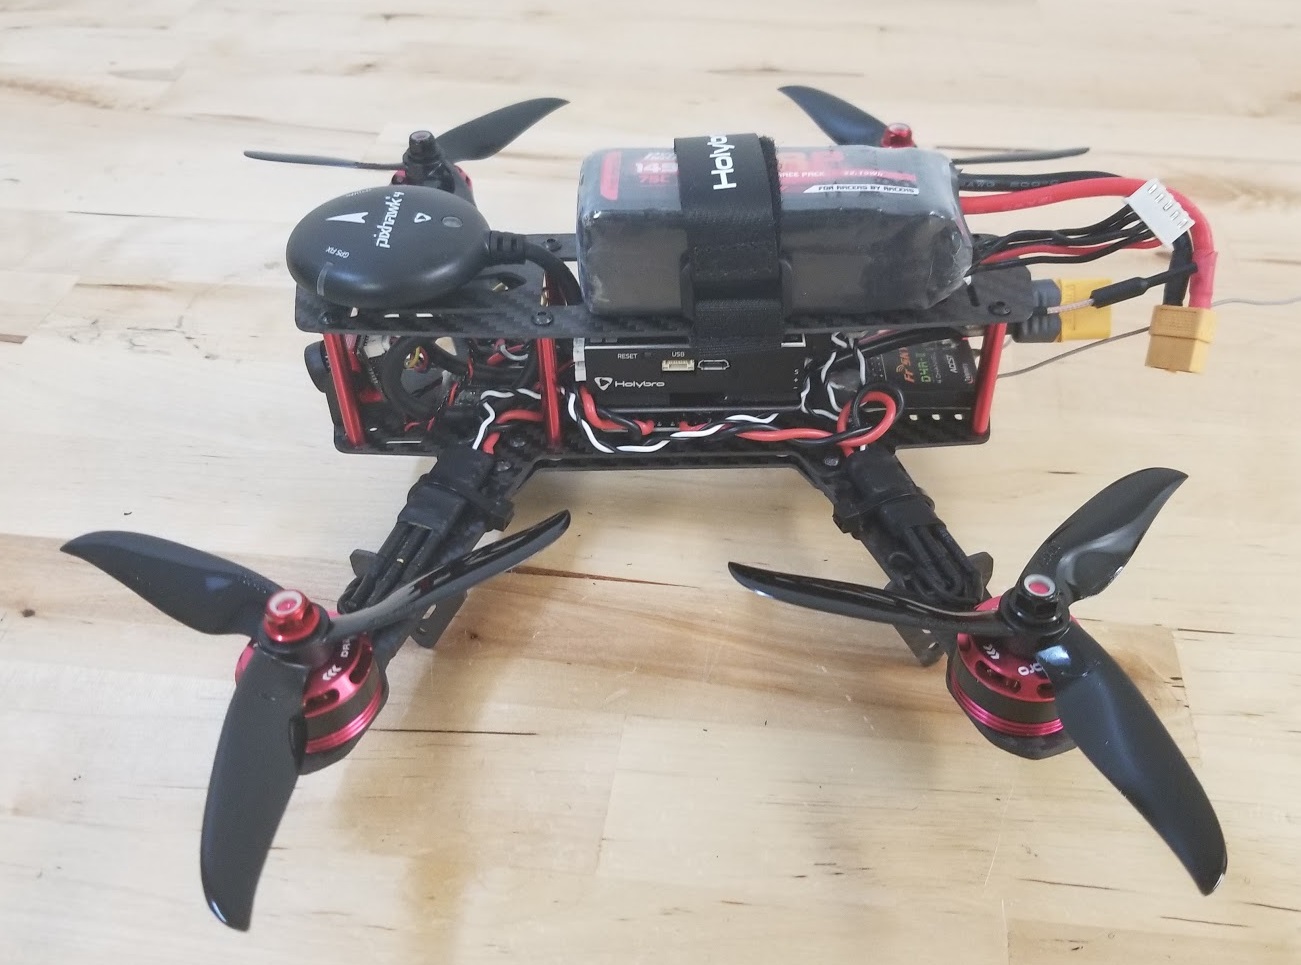
将模块安装到顶板上(使用提供的 3M 胶带或浆糊)。然后将顶板放在支座上,如图所示
最后一个装配步骤是用魔术贴固定电池。
基本框架制作现在已经完成(如果需要,您可以在以下文档中找到更多有关连接组件的信息 Pixhawk 4 接线快速入门).
如果您拥有该工具包的基础版,现在就可以跳转到有关如何 安装/配置 PX4.
# FPV 组件
该套件的 "完整版还配有 FPV 系统,如图所示,该系统安装在载具前部。
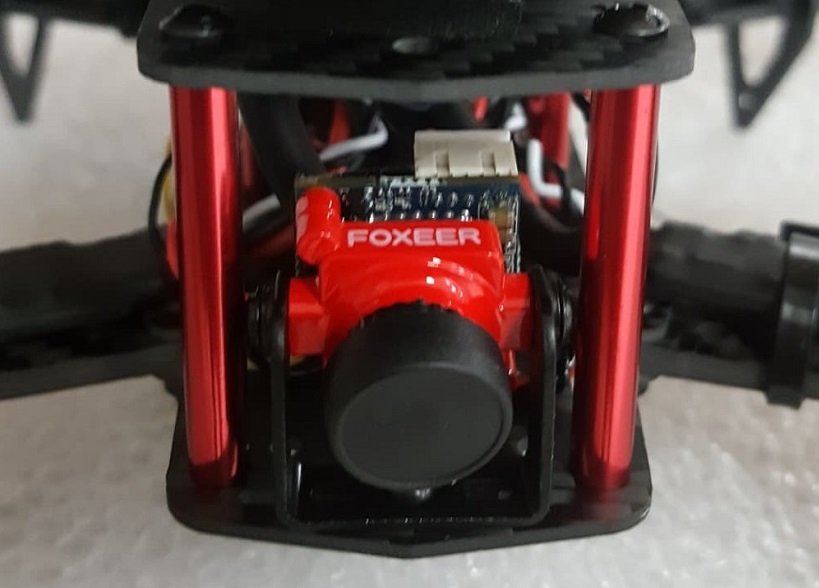
安装套件的步骤如下:
- 将相机支架安装到框架上
- 将相机安装到支架上
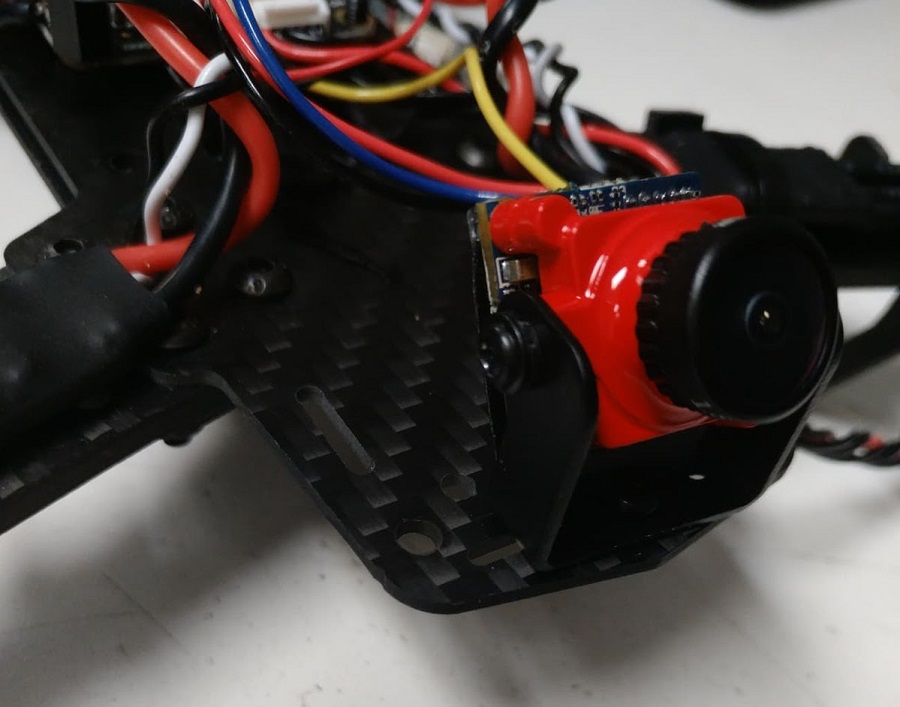
- 整套套件上的电源模块带有连接视频发射器和摄像头的接线:
- 安装摄像头连接器
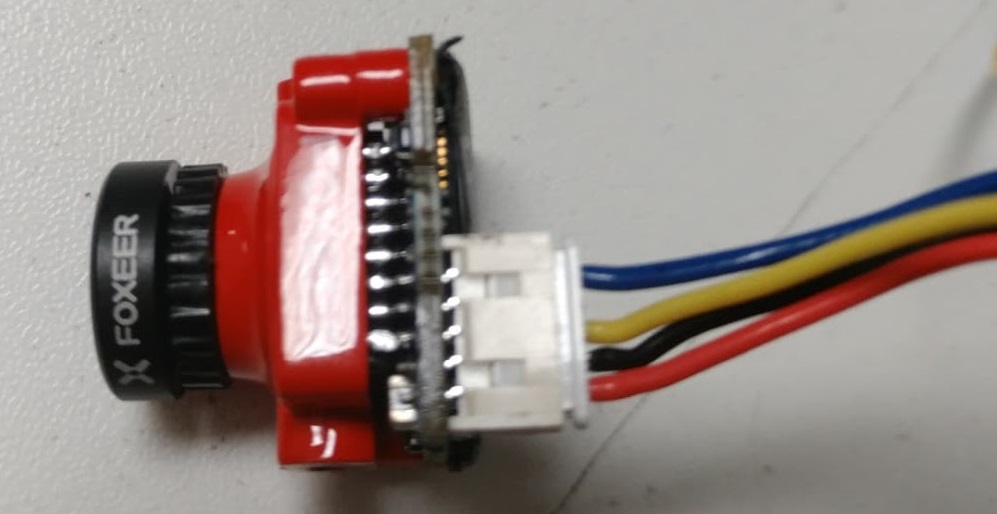 接线如下:蓝色=电压传感器,黄色=视频输出,黑色=接地,红色=+电压。
 - 连接视频传输器 (VTX) 连接器
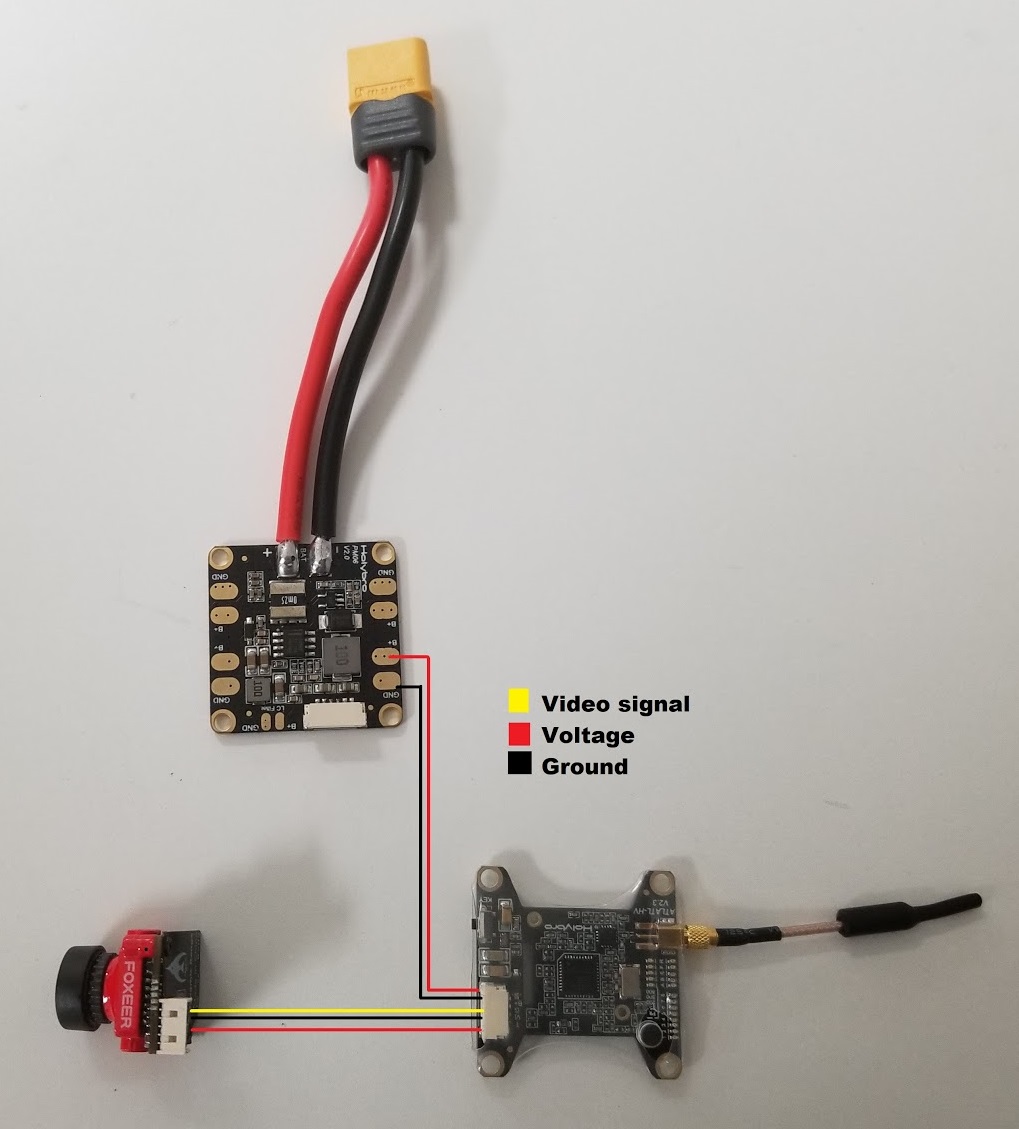
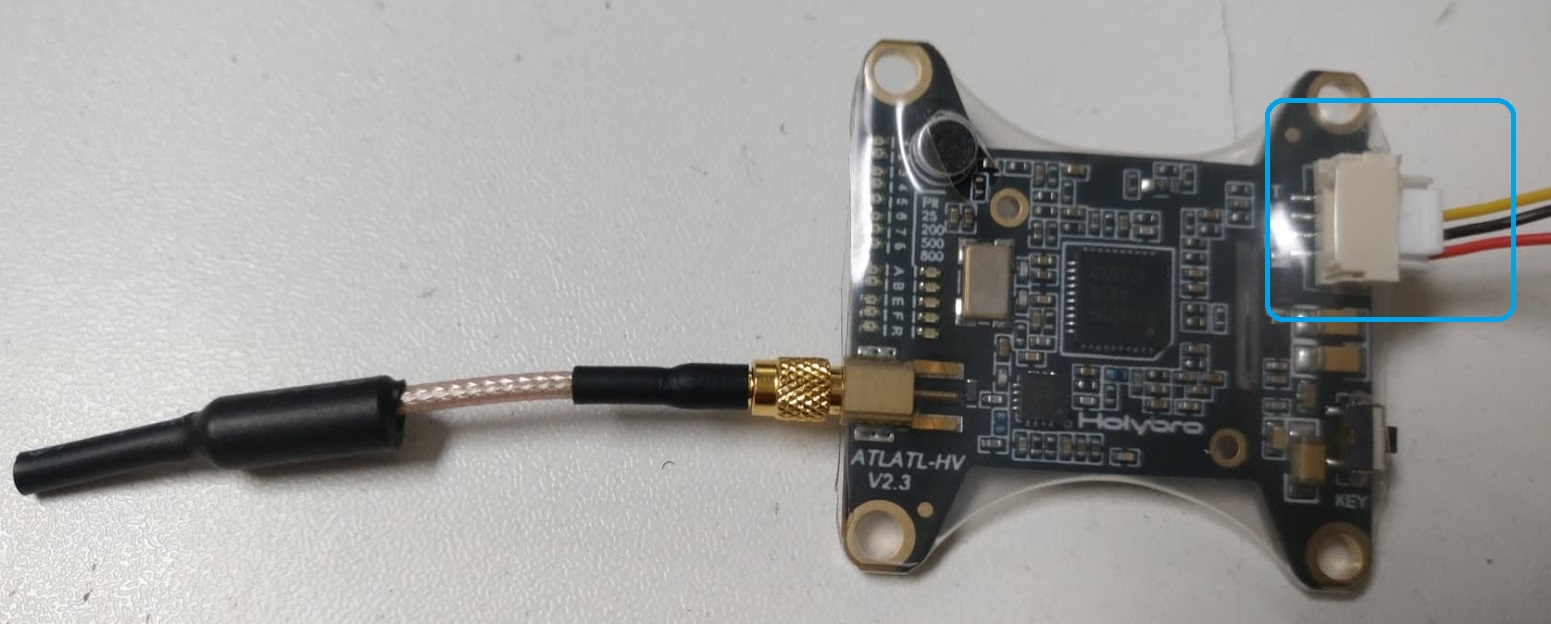 导线为:黄色=视频输出,黑色=接地,红色=+电压。
- 安装摄像头连接器
- 用胶带将视频发射器和 OSD 板固定在机架上。
备注
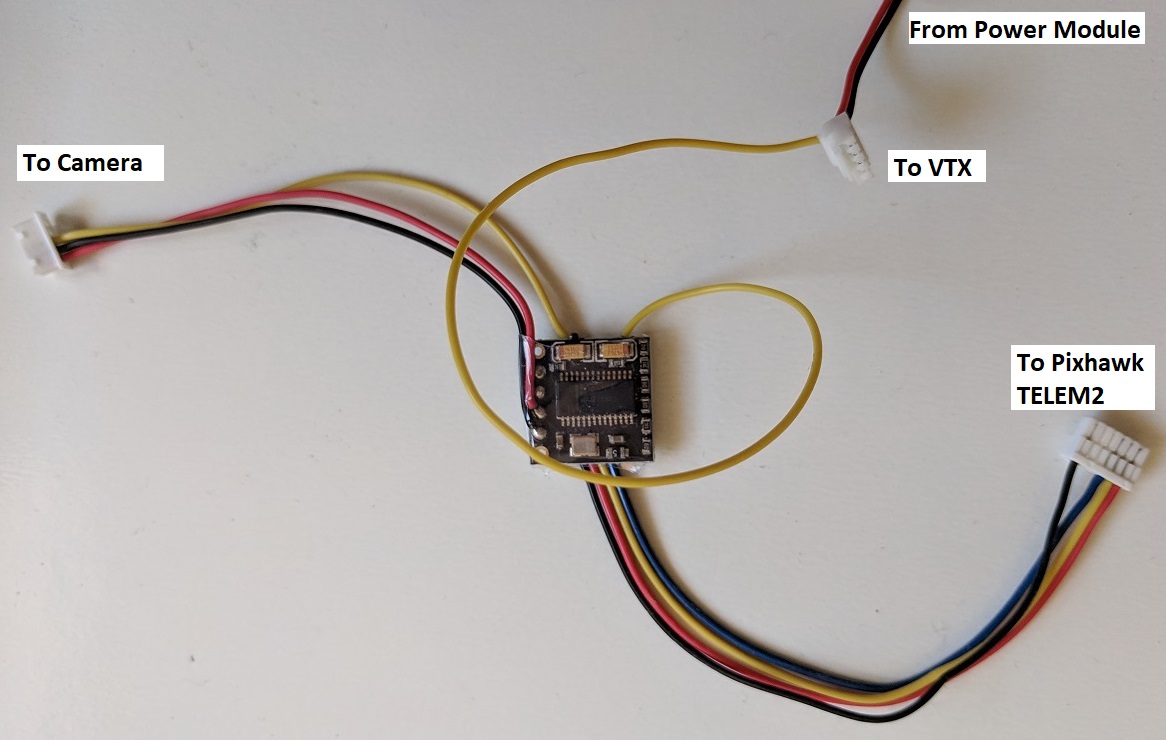
如果您需要自己为系统布线,下图显示了摄像机、VTX 和电源模块之间的所有连接:
# 安装/配置 PX4
QGroundControl 用于安装 PX4 自动驾驶仪并为 QAV250 机架进行配置/调整。 下载并安装 (打开新窗口) QGroundControl 您的平台。
TIP
有关安装和配置 PX4 的完整说明,请参见 基本配置.
首先更新固件和机身:
然后执行必要的设置/校准:
理想情况下,你也应该这样做:
# 调音
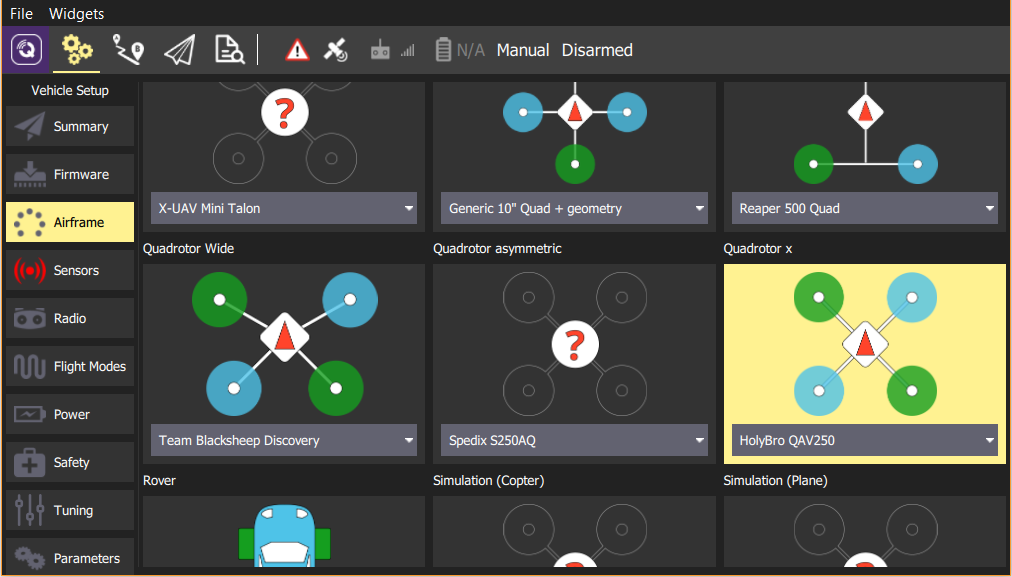
机身选择套件 默认 机架的自动驾驶参数。这些参数足以满足飞行需要,但最好还是针对特定的机架结构调整参数。
有关调整参数的一般信息,请参见 多旋翼飞行器 PID 调整指南.
# 致谢
该构建日志由 PX4 测试团队提供。